- EaseUS Freeware
- Free Data Recovery Software
- Free Backup Software
- Free Partition Manager
Updated on 2025-03-31
This article applies to:
EaseUS Todo Backup Enterprise Edition
What is System Transfer?
System Transfer is a powerful feature that allows users to transfer operating systems to dissimilar computers, in spite of different hardware.
- What Do You Need to Prepare before Using System Transfer
- Before starting a system transfer, please follow the below steps:
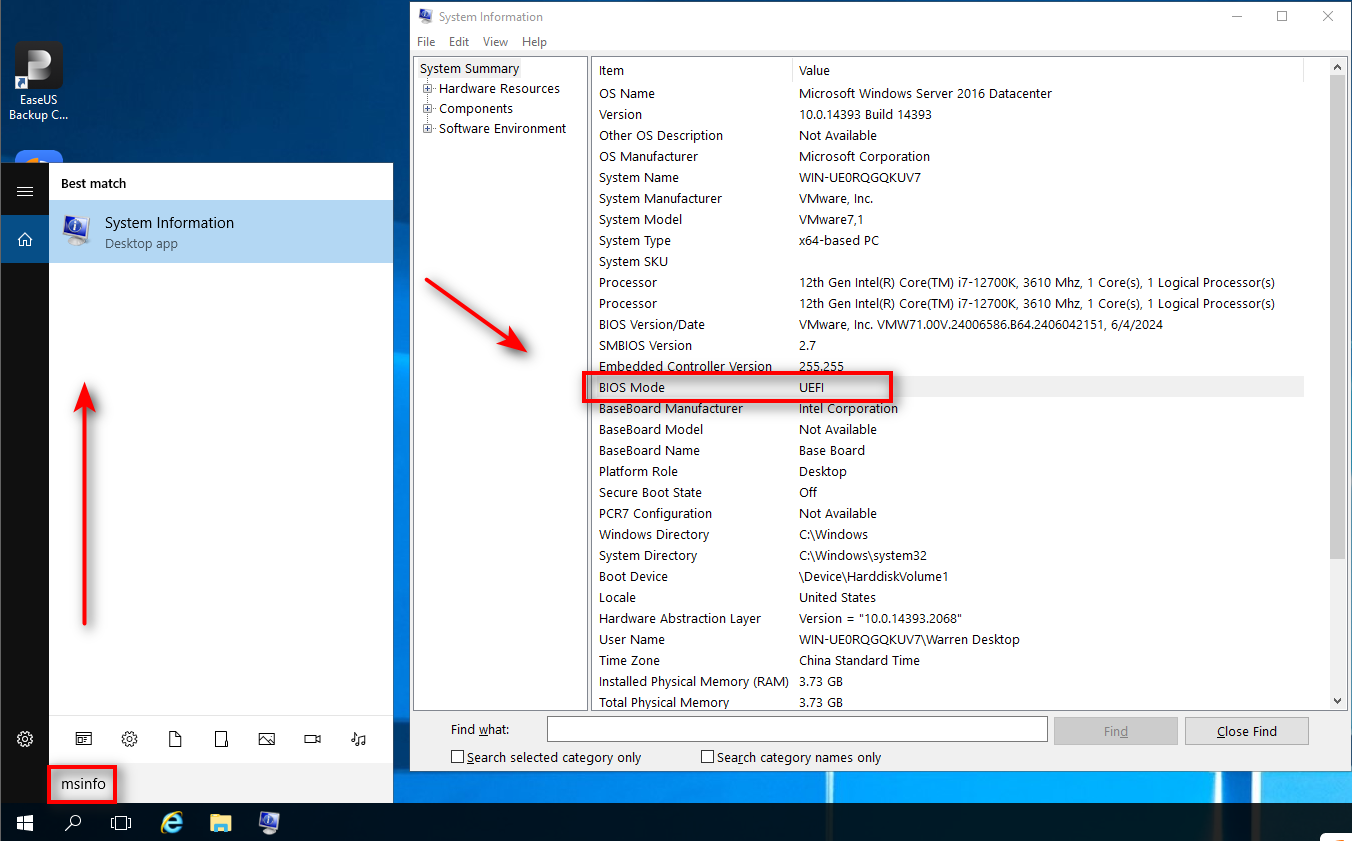
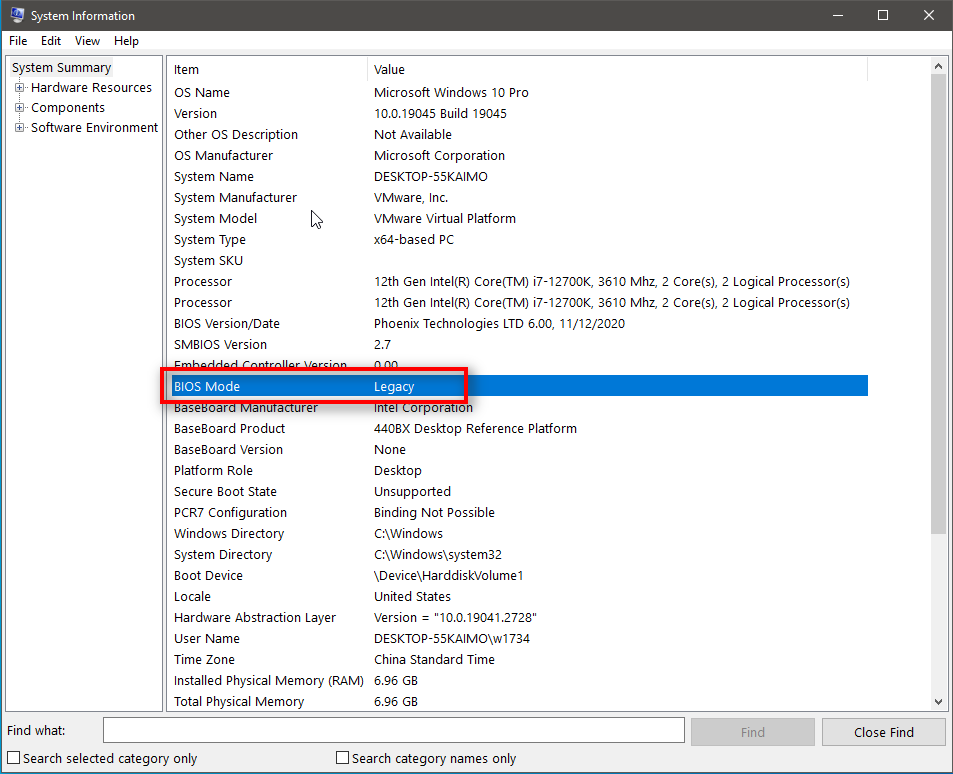
1. Check the boot modes of both computers(UEFI or Legacy).
Computers boot into UEFI and Legacy modes. For UEFI computers, they use GPT system disks and for Legacy computers, they use MBR system disks. To complete a system transfer, the two computers should share the same boot mode.
You can highlight Windows icon, insert "msinfo32" and find out the boot mode via "BIOS Mode". If your computers have different modes, please chat here for a customized solution:
Click here for more details.
2. Back up the source computer system to an external drive.
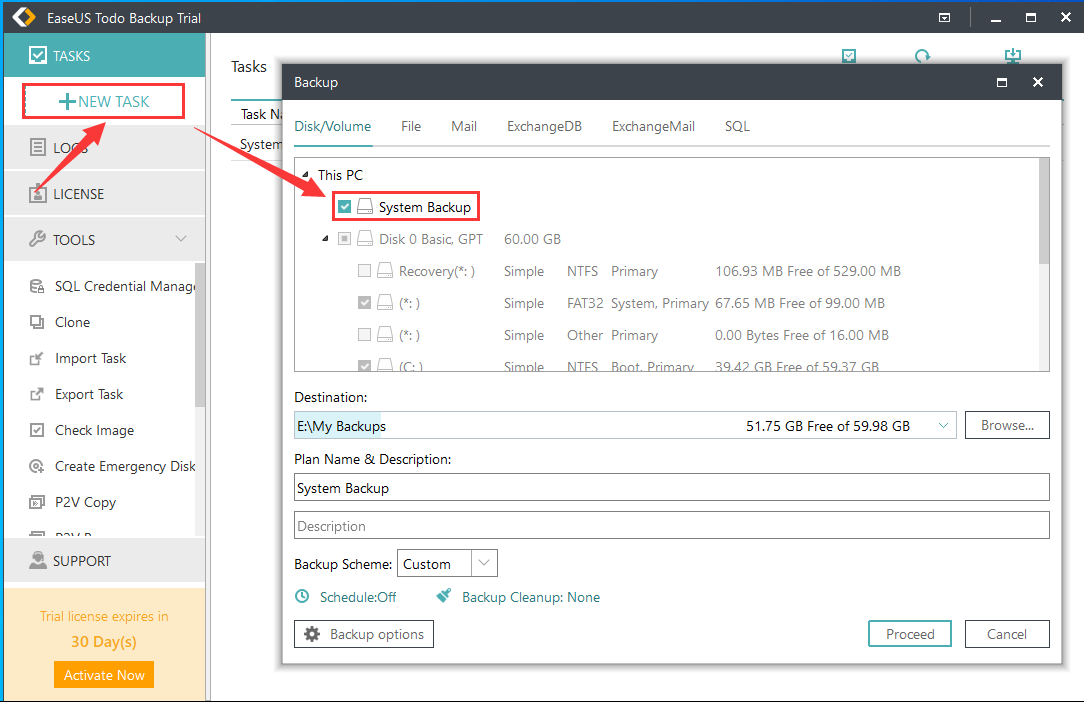
Note: To transfer everything, please navigate to Disk/Partition backup, and select the entire system disk.3. Activate EaseUS Todo Backup on the target computer and create an Emergency Disk.
Click here for more details.
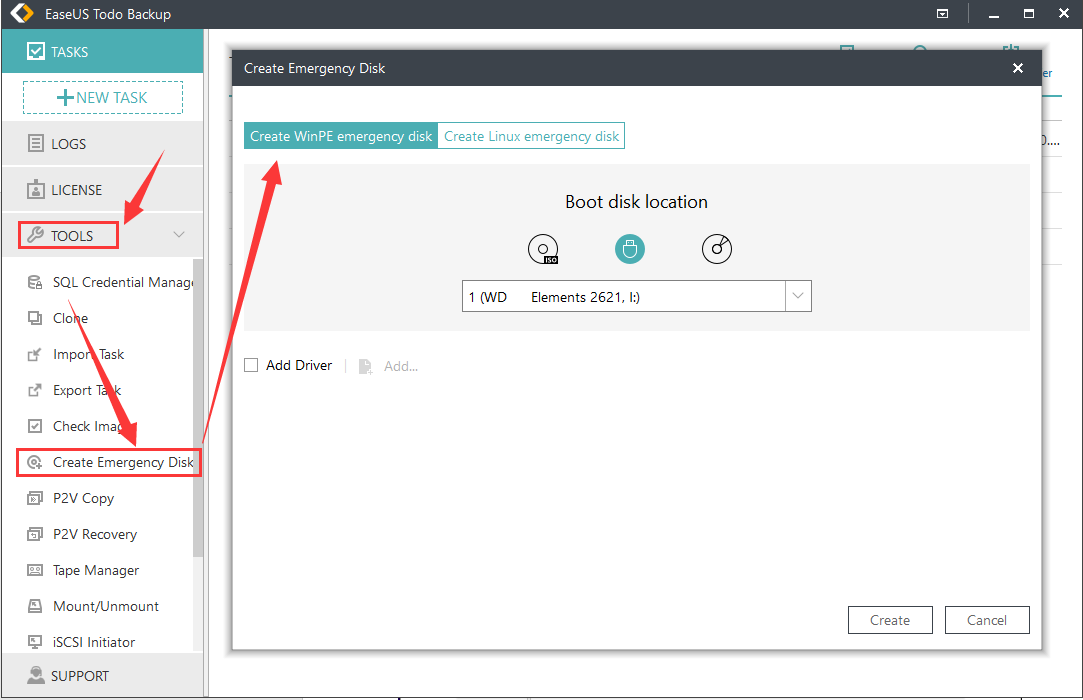
Note: If the target computer has special hardware such as a Raid array, please click prepare the drivers and add them via "Add Driver" button.
1. Please connect both the Emergency disk, and external backup disk to the target computer, set the emergency disk as the primary boot device in the BIOS, and boot the target computer.
If you do not know how to do this, please chat here.
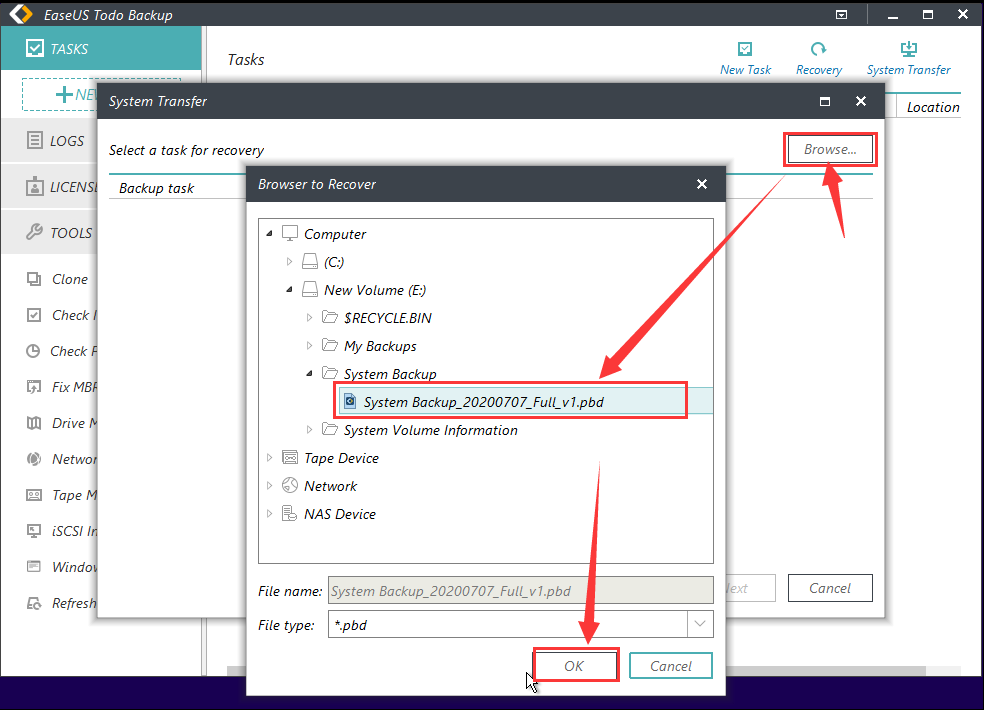
2. When the computer boots into EaseUS Todo Backup, please click System Transfer->Browse, and select the system backup image of the source computer.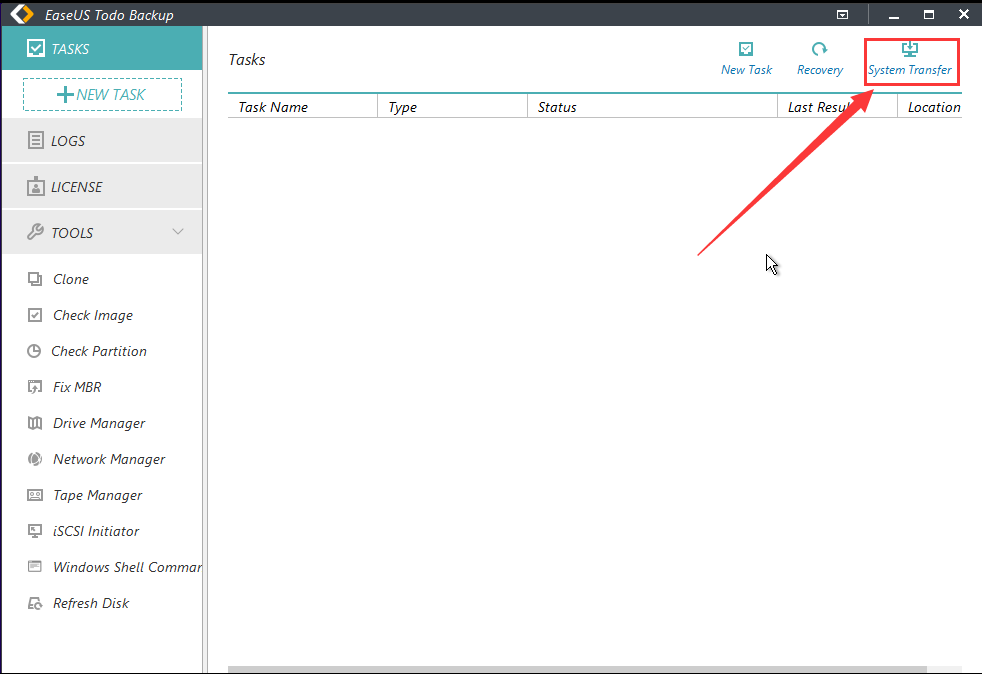
3. Under "Recover to:", please select the target disk.
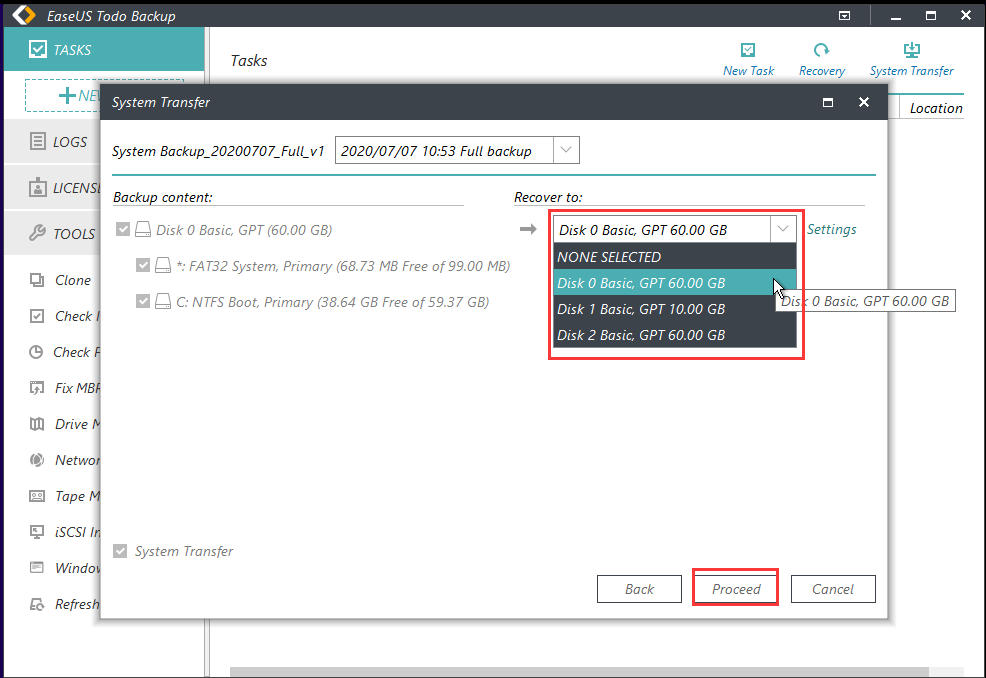
4. Once completed, please set the target disk as the primary boot device in BIOS, and reboot the computer.
Need Expert Assistance?
If you need more professional assistance, EaseUS 1 on 1 Remote Assistance Service provides to schedule a remote desktop session with dedicated support engineer to help you take care of the cases such as Operating System Migration, Backup Task Customization, Windows Boot Error Fixing, Data Recovery and more. Click HERE to learn more about this service.
Access Live Chat Call Us: 1-800-992-8995
Common Questions
- 1. What to do if you cannot find the target hard drive listed in the WinPE bootable media?
-
When this happens, please click HERE and follow the steps in this page to troubleshoot this issue and fix it.
- 2. How to solve the "There is insufficient space on target disk error" when trying to restore the system backup?
-
Please delete all the partitions on the target hard drive. You can enable Windows Shell Command under Tools and use the Diskpart command to delete the partitions. Please click HERE to get a more detailed insctrution on how to use the Diskpart command to delete partitions. <
Note: Please ensure you moved all the data out from the target drive before you delete the partitions.