- EaseUS Freeware
- Free Data Recovery Software
- Free Backup Software
- Free Partition Manager
Updated on 2015-04-23
This article applies to:
EaseUS Data Recovery Wizard for Mac

Instruction
In order to increase the probability of recovering lost files, the program will list every possible file. So there might be a huge amount of files listed after the scan. It seems impossible to locate your desired files among these files. However, this article is written to help you at this very moment.
Solution
In fact, there are several options in the program, with which, the desired files could be easily located in the scan result. If you fail to find the lost files, please try again with the following methods and you might get a wonderful result.
1. Search files
After the scan completed, you could find a Search Box on the right top corner of the program page. Please search the needed files by Key Words, File Extensions, or by any customization search combinations.
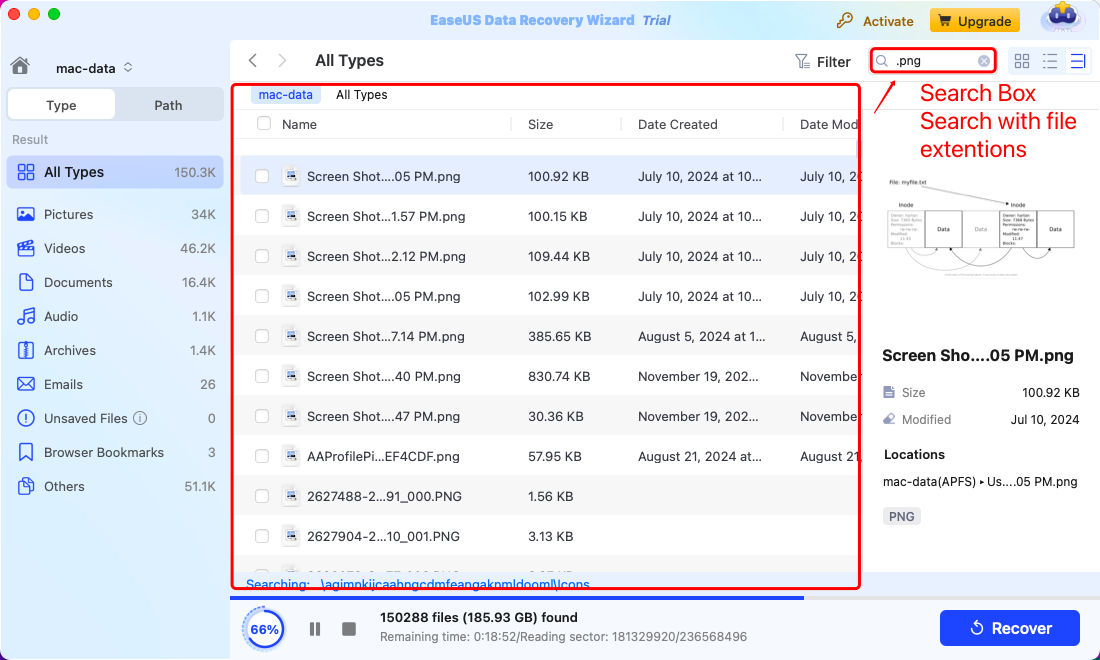
The program will list all the found files that meet the search criteria. Then please check all the listed files again.
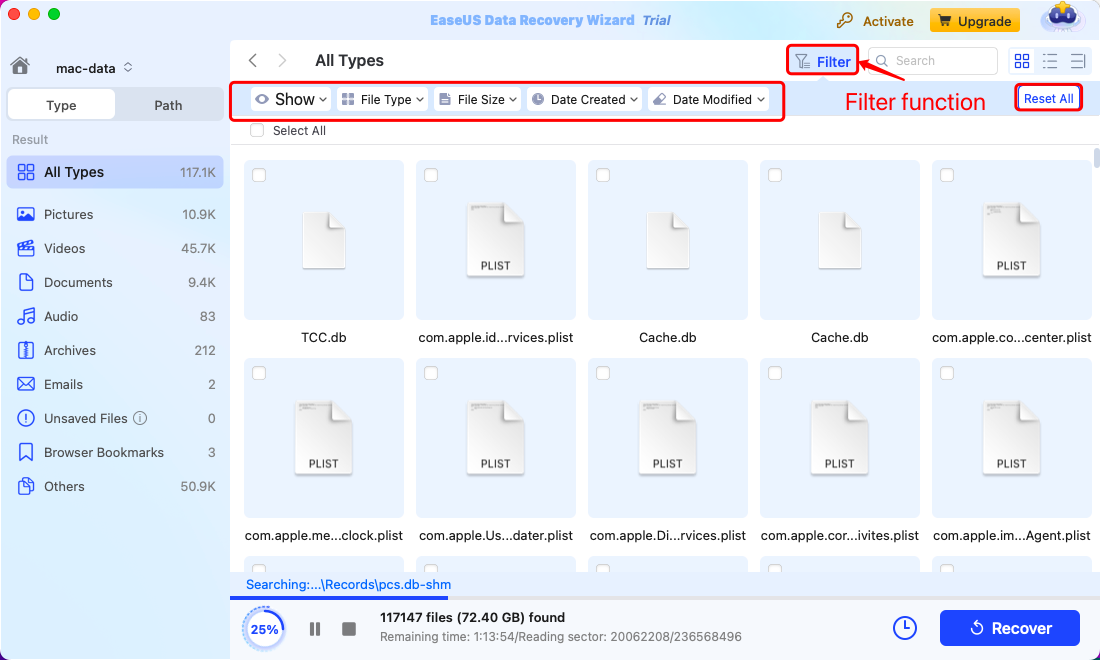
The "Filter" feature is also a good tool to help you search lost files by Type, Size and Date.
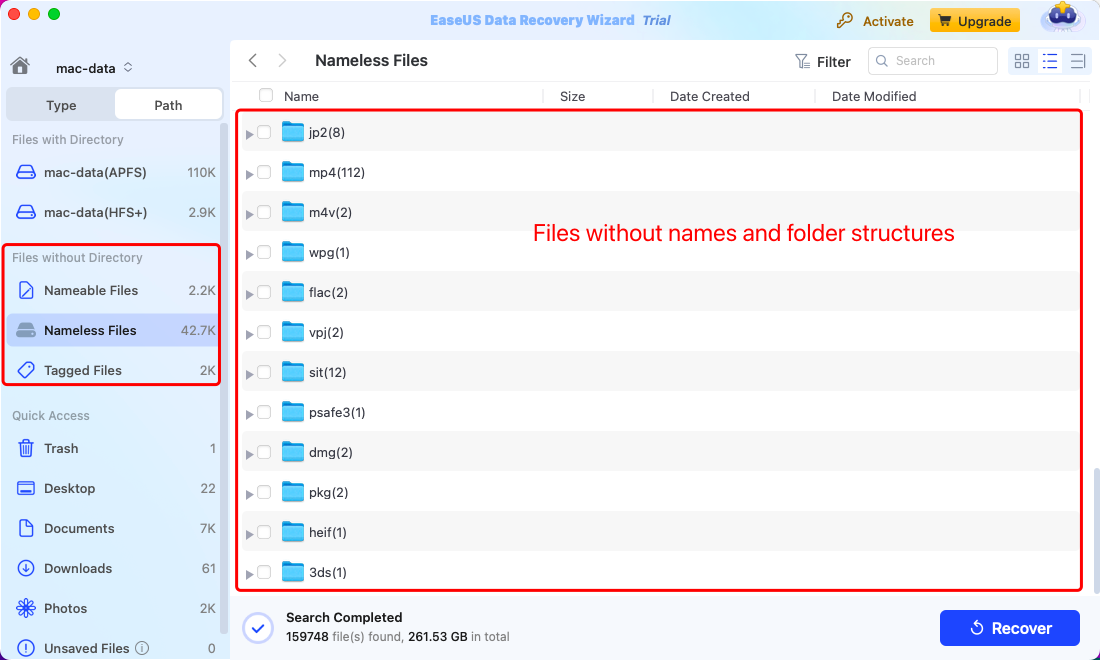
2. RAW files folder
Generally, file storage is made up of the file directory information (contains the file name, establish time, the storage place of data content, etc.) and the specific data content. The two parts are saved on different areas on the disk/drive/partition.
If both parts of the file are intact after lost, our program would recovery the file with its original information. But sometimes the file directory information might have been damaged. The only way to recover the lost files is from the file content area directly. However, all the found files will be renamed and included in the folders named “Nameless Files” and "Tagged Files".
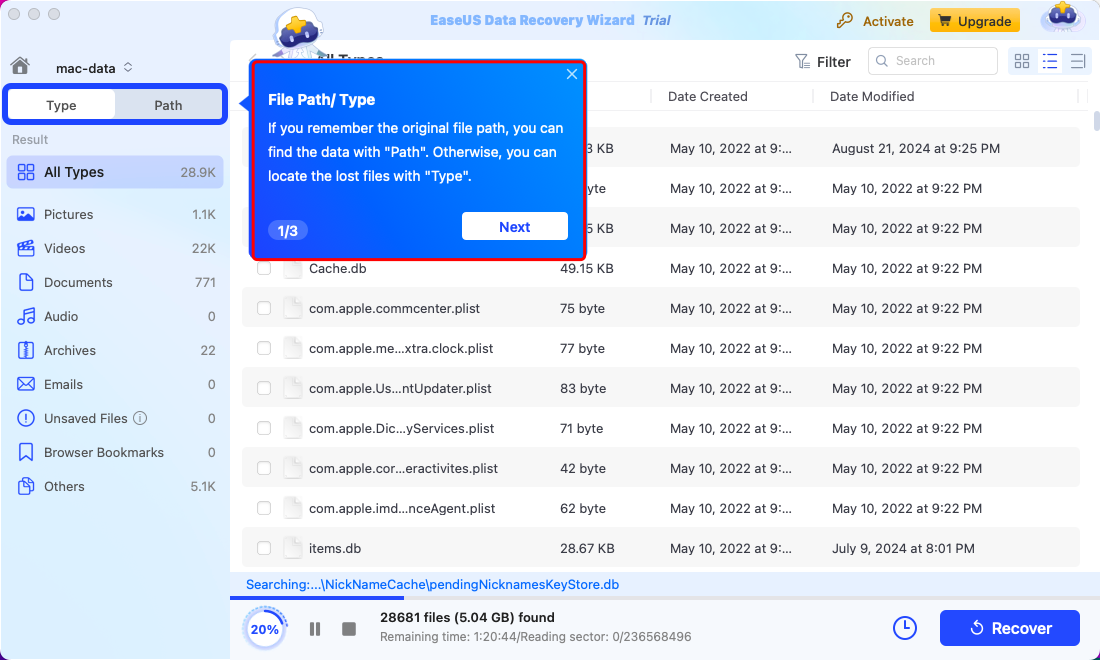
3. List file in different categories
All detected files are listed in Path/Directory by default. If you prefer to list them by File Type or by Established Time, you could easily achieve this by clicking “Type” on the left top corner of the page. This usually works when you have one specific file type to recover.
If there are still some files lost, especially when there is a huge amount of files to recover, you could try different methods to locate your required files in the scan result.
Note:
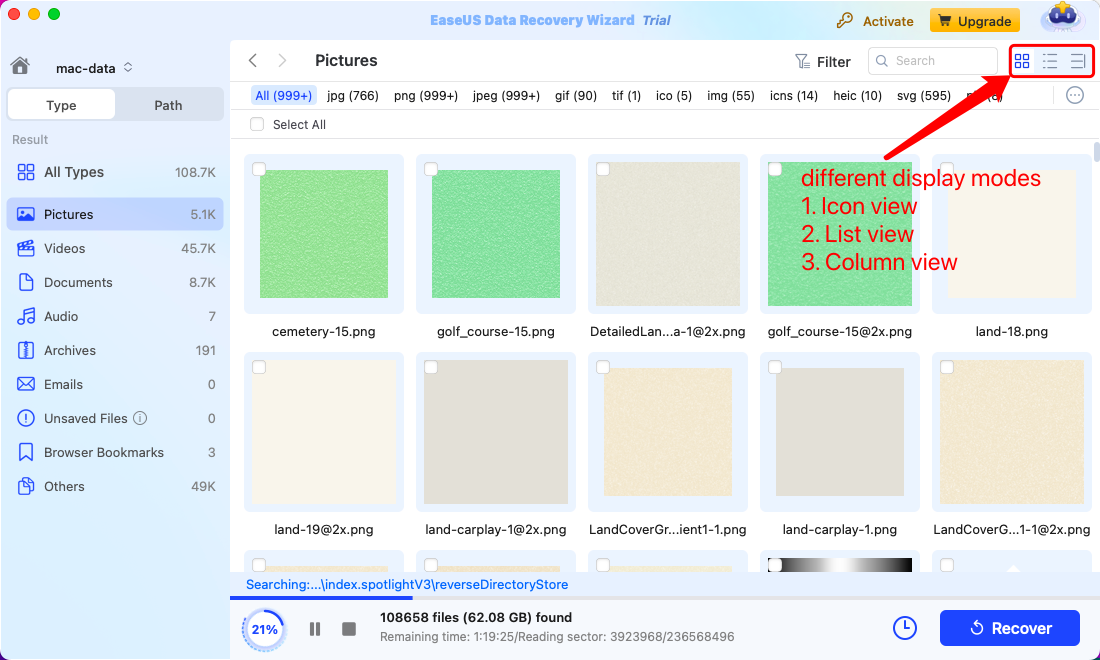
After the scan, you could find options on the right top corner of the program page to change the file displays. It is very helpful when you want to view the thumbnails of the found pictures or preview the files. With this method, you will find it’s so easy to locate your desired files.
Tips:
1. If you are a paid user, it is better for you to save all listed data first, and then search for desired ones.
2. Please NEVER try to recover data to the original location where contains lost data until you have all your data recovered.
3. Only Recover button on the top half of the page can help you save files to a specified location. Export Scan Status exports scan result only for later use.
Was this article helpful?