- EaseUS Freeware
- Free Data Recovery Software
- Free Backup Software
- Free Partition Manager
Updated on 2020-12-24
Applies to:
EaseUS RecExperts for Mac
EaseUS RecExperts for Mac is a light but professional screen recording tool integrated with the ability to record anything displayed on screen with different audio input (System sound, Microphone or Both System sound and microphone), even your screen activities on your iPhone/iPad. It can be a reliable helper when recording webinars, presentations or creating video tutorials, product demonstration, etc.
This guide will show the main features of this product and how to properly use it to capture the screen of your Mac.
Preparation
When launching EaseUS RecExperts on your Mac, the first you need to choose is how you would like to record.
The software supports to record video and audio.
For video recording, there are 3 options, to record the screen of your Mac, to record via the build-in camera, and to record the screenshot of your iOS device via Airplay or USB.
With the first option Screen Record, you can crop to any size at your needs, or simply double tap your mouse or touch Trackpad to capture Full screen.

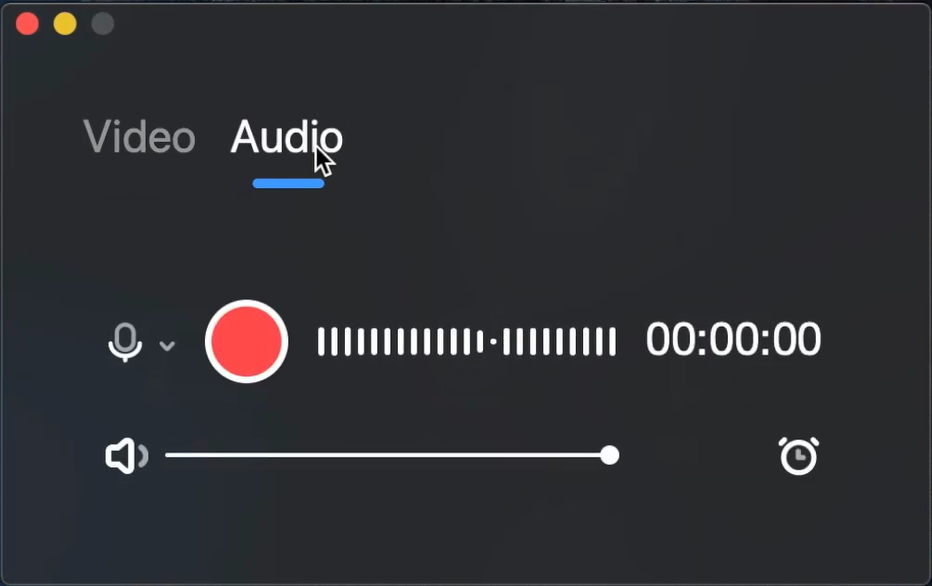
For audio recording, you can record the voice only.
The software supports to record video and audio.
For video recording, there are 3 options, to record the screen of your Mac, to record via the build-in camera, and to record the screenshot of your iOS device via Airplay or USB.
With the first option Screen Record, you can crop to any size at your needs, or simply double tap your mouse or touch Trackpad to capture Full screen.
For audio recording, you can record the voice only.
Panel
At the button of the screen, you will find a panel providing various options to customize the recording. You can chose the Size and Quality of the videos. 4K is perfectly supported in our software.
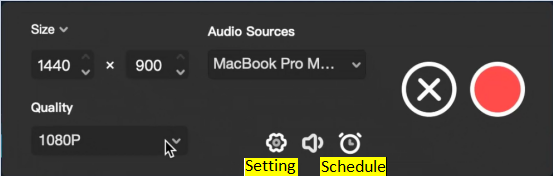
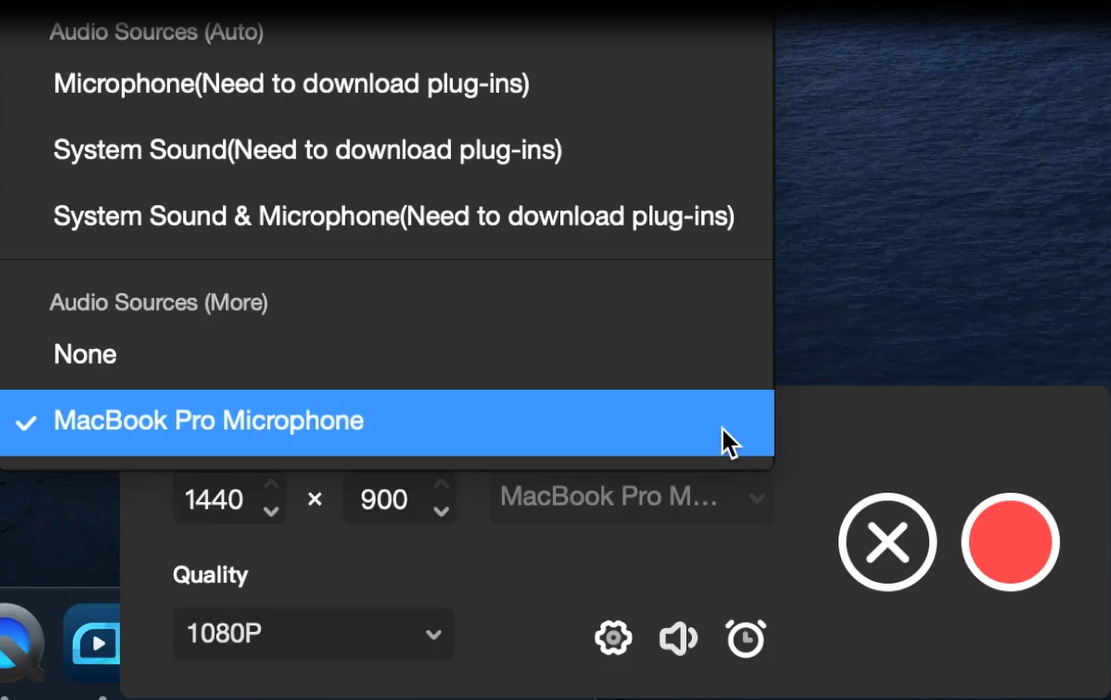
In Audio Sources, you are able to select if you want to record via the Microphone, System Sounds, both or None.
In Audio Sources, you are able to select if you want to record via the Microphone, System Sounds, both or None.
Tip:
If this is the first time you use the software, please download a plugin to record the system sound. Please follow the guide in the wizard, install the plugin properly and relaunch the Screen Recording Panel. For more information about the plugin, please click here.

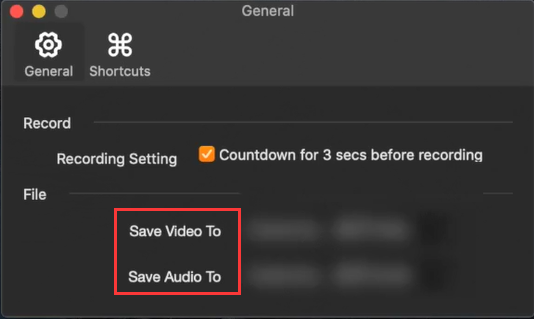
You can also click Setting icon to open Setting Page to set the destination location to save the recording and the hotkeys to start/stop the record.
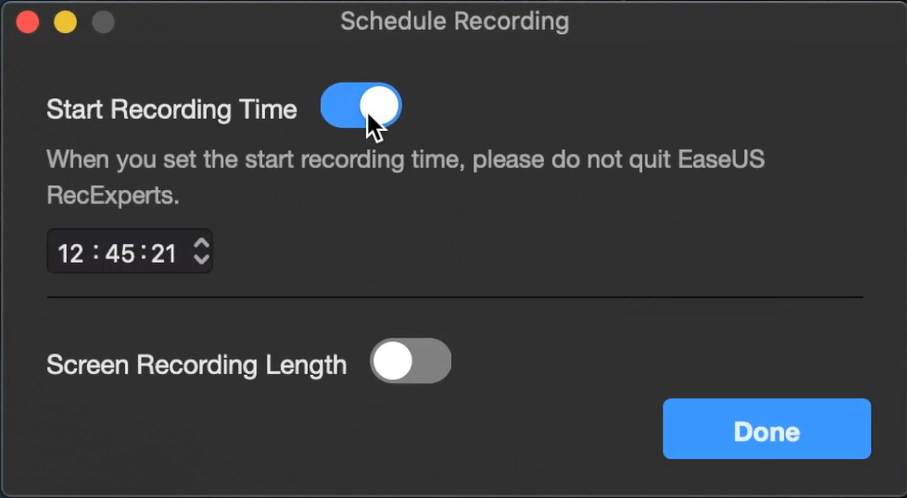
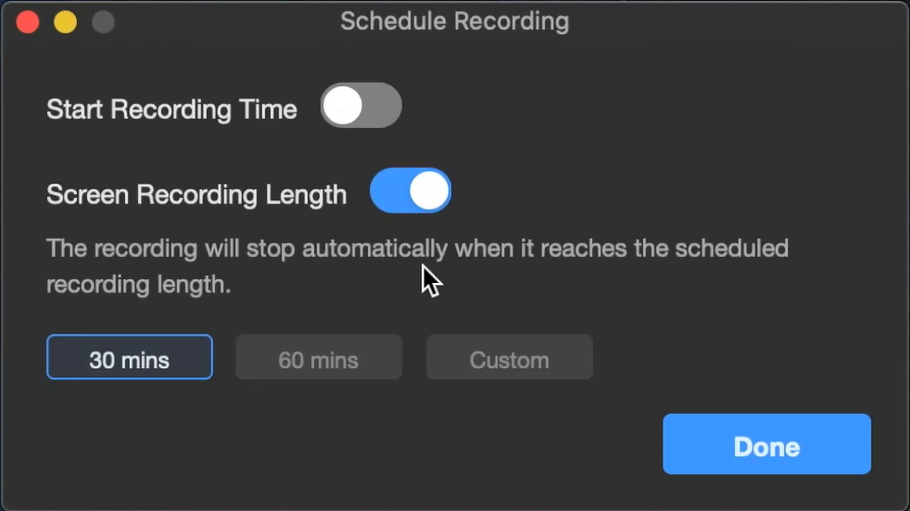
In the Schedule page, you are able to enable Start Recording Time and set a specific time to trigger the record.
By enabling Screen Recording Length, the software will stop the recording automatically. You can set to stop the recording after 30 mins,60 mins or any time you want.
In the Schedule page, you are able to enable Start Recording Time and set a specific time to trigger the record.
By enabling Screen Recording Length, the software will stop the recording automatically. You can set to stop the recording after 30 mins,60 mins or any time you want.
Recording Process
After all is ready, press the Red Record button or use hotkey(Command+1) to start recording. At the top bar, you are able to see the duration time of this recording, the Pause button and the Stop button.
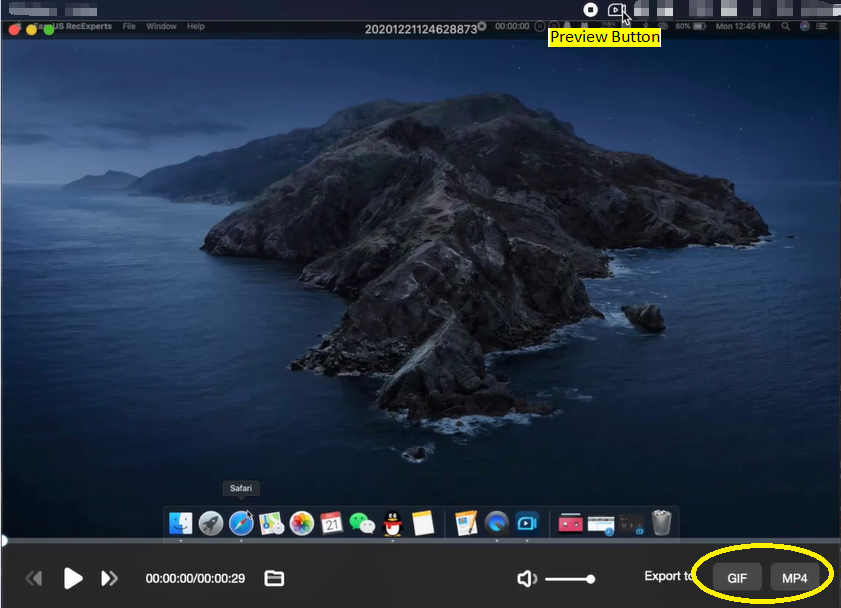
When the record is done, press the Red Record button or hit the hotkey(Command+2) to stop the recording. A preview window will pop up so that you can confirm that you’ve got everything you need.
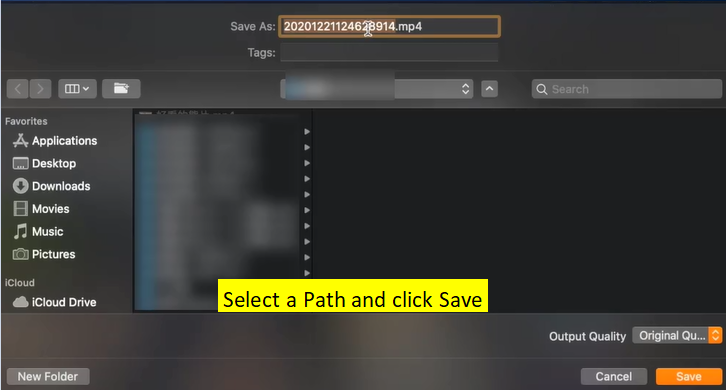
In the right corner of this preview window, you are able to export the recording to GIF or MP4 format. Choose one at your need and select a path to export the recording.
When the record is done, press the Red Record button or hit the hotkey(Command+2) to stop the recording. A preview window will pop up so that you can confirm that you’ve got everything you need.
In the right corner of this preview window, you are able to export the recording to GIF or MP4 format. Choose one at your need and select a path to export the recording.
iOS Devices Recording
EaseUS RecExperts for Mac can also record the screen on your iOS devices which are connect to the Mac by Airplay or USB cable. Click the device in the application and you will be able to capture the screen of the iOS device from the Mac.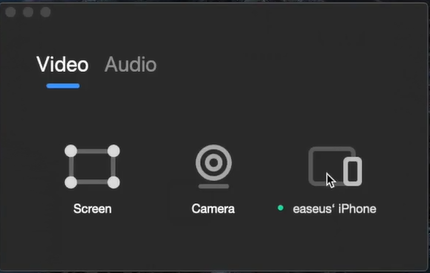
Need Expert Assistance?
If you need more professional assistance, EaseUS 1 on 1 Remote Assistance Service provides to schedule a remote desktop session with dedicated support engineer to help you take care of the cases such as Operating System Migration, Backup Task Customization, Windows Boot Error Fixing, Data Recovery and more. Click HERE to learn more about this service.
Access Live Chat Call Us: 1-800-992-8995