- EaseUS Freeware
- Free Data Recovery Software
- Free Backup Software
- Free Partition Manager
Updated on 2021-04-14
Applies to:
EaseUS PDF Editor
Many PDF documents have pictures inserted, so how can EaseUS PDF Editor be used to delete and add pictures? Please refer to the detailed operations in the article.
Guides on Editing Images with EaseUS PDF Editor
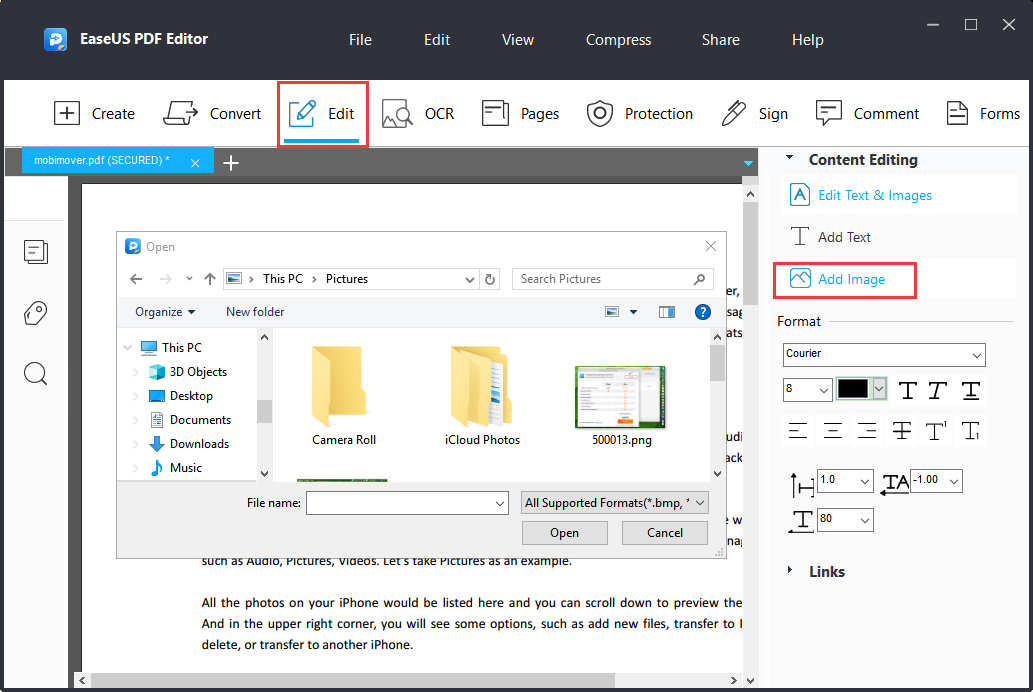
1. Add Image
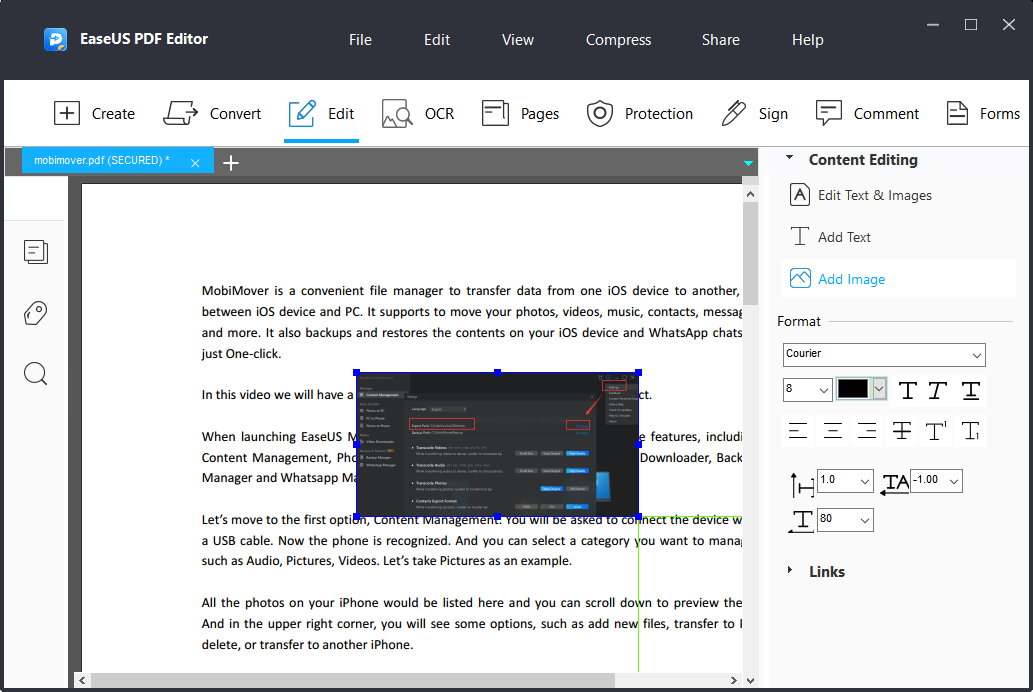
To add a picture to a PDF file, just click “Edit” and select “Add Image” in the function bar on the right. Then you will be asked to select the picture and add it to the PDF page.
Then resize the picture appropriately by dragging the mouse on the edge of the picture and place it in the appropriate position.
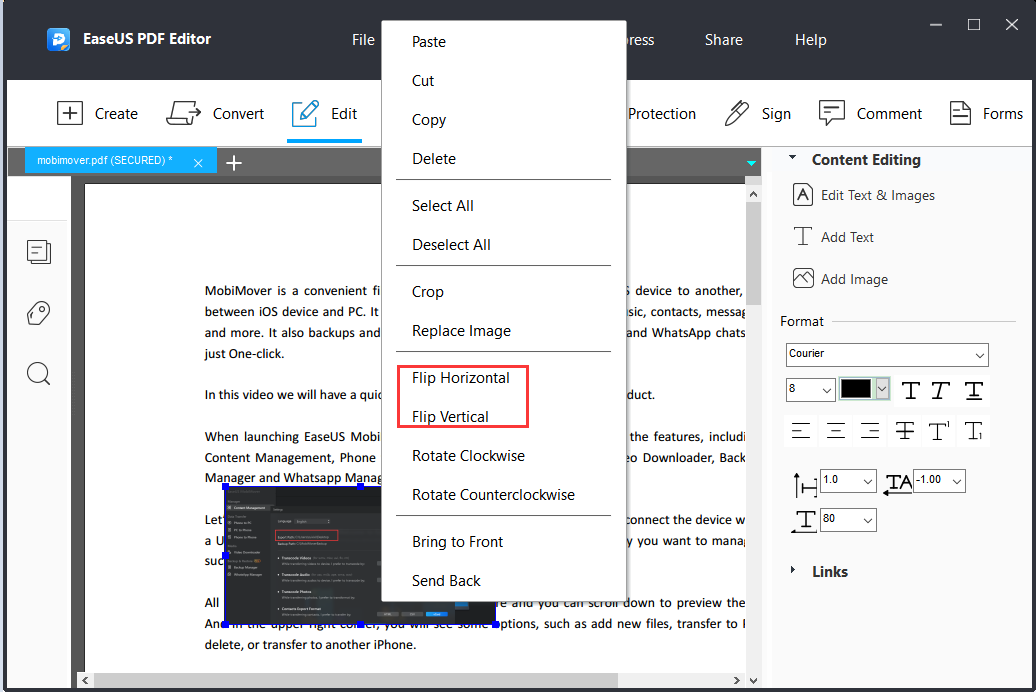
2. Delete Image
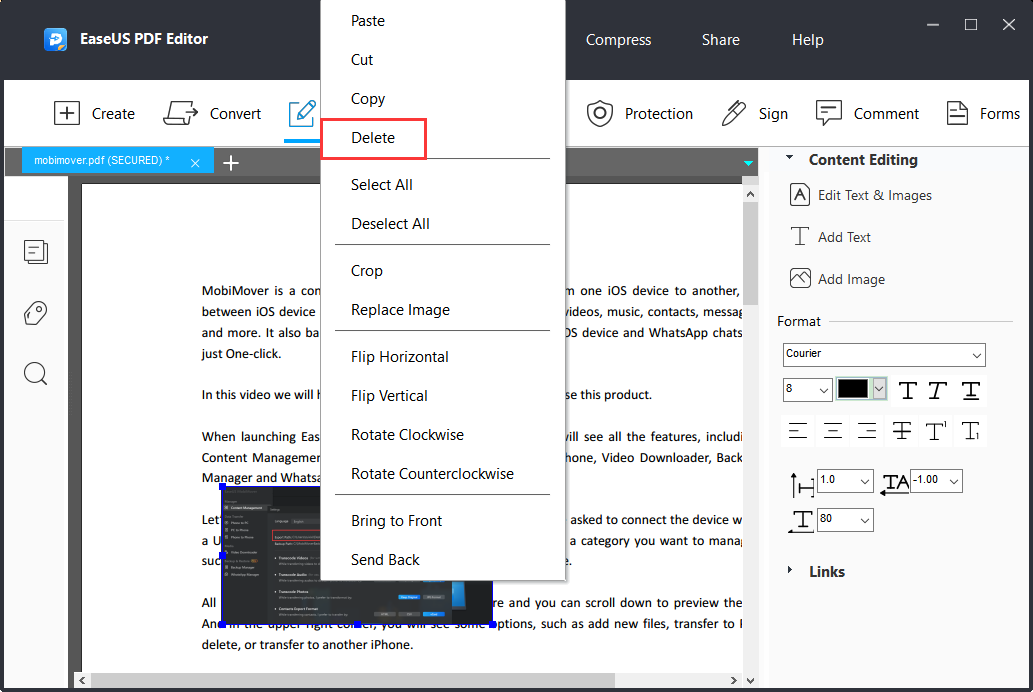
If you need to delete the picture, right-click and select "Delete" option.
3. Layer/rotate/replace/crop/flip image
Layer: If you want to place the text on top of the image, select the image, then right-click and select “Send Back” to place the image at the bottom of the text. If you want to place the picture above the text, right-click and select “Bring to Front”.

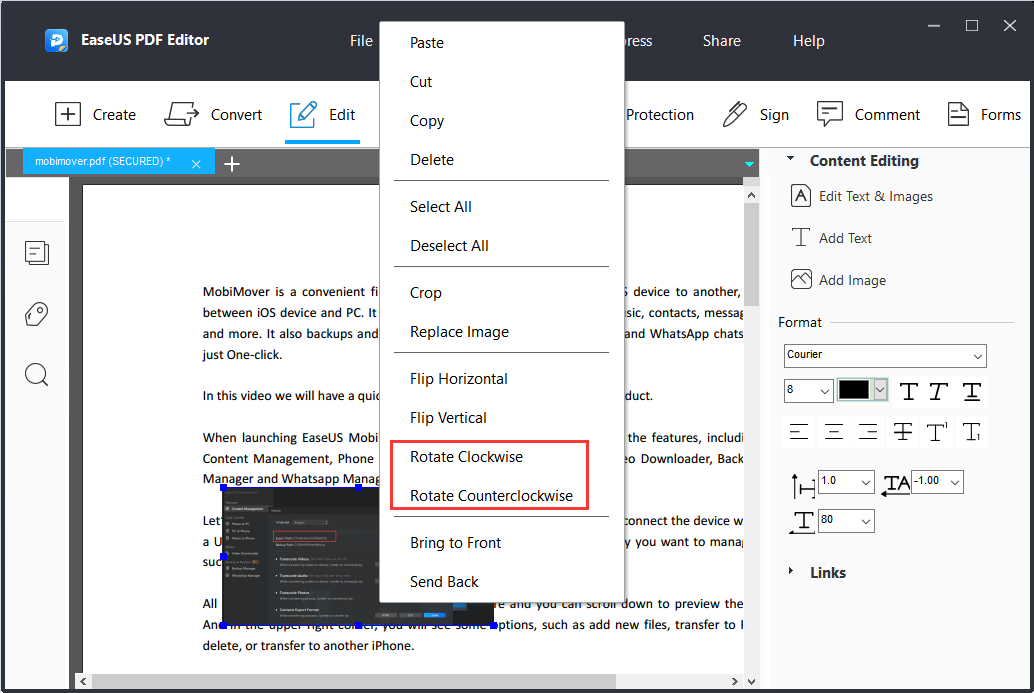
Rotate the picture: If you want to change the direction of the picture, right-click the picture, and select “Rotate Clockwise” or “Rotate Counterclockwise” to rotate accordingly.
Replace picture: Right click to select “Replace Image”, select the picture in the computer folder, you can replace the selected picture.
Crop: Right-click the picture, select “Crop”, move the mouse to the picture frame, and drag the mouse to crop the picture.
Flip: Right-click and select “Flip Horizontally” or “Flip Vertically”.
EaseUS PDF Editor
Many PDF documents have pictures inserted, so how can EaseUS PDF Editor be used to delete and add pictures? Please refer to the detailed operations in the article.
Guides on Editing Images with EaseUS PDF Editor
1. Add Image
To add a picture to a PDF file, just click “Edit” and select “Add Image” in the function bar on the right. Then you will be asked to select the picture and add it to the PDF page.
Then resize the picture appropriately by dragging the mouse on the edge of the picture and place it in the appropriate position.
2. Delete Image
If you need to delete the picture, right-click and select "Delete" option.
3. Layer/rotate/replace/crop/flip image
Layer: If you want to place the text on top of the image, select the image, then right-click and select “Send Back” to place the image at the bottom of the text. If you want to place the picture above the text, right-click and select “Bring to Front”.
Rotate the picture: If you want to change the direction of the picture, right-click the picture, and select “Rotate Clockwise” or “Rotate Counterclockwise” to rotate accordingly.
Replace picture: Right click to select “Replace Image”, select the picture in the computer folder, you can replace the selected picture.
Crop: Right-click the picture, select “Crop”, move the mouse to the picture frame, and drag the mouse to crop the picture.
Flip: Right-click and select “Flip Horizontally” or “Flip Vertically”.