- EaseUS Freeware
- Free Data Recovery Software
- Free Backup Software
- Free Partition Manager
Updated on 2020-07-08
Why You Need to Read This?
Apple has introduced a security mechanism since macOS 10.14 (Mojave), which requires special access to be granted to remote control applications like TeamViewer. If you use macOS 10.14 or higher version, it is neccessary to enable the accessibility permissions for TeamViewer, otherwise the TeamViewer will not be installed, or any TeamViewer users connecting to macOS 10.14 or higher version will not get the ability to see or control anything on this mac.
This article guides on how to enable the access permissions for TeamViewer on macOS 10.14 (Mojave) or higher versions. In case you have not yet installed TeamViewer on your Mac, please click HERE.
Install TeamViewer
During the installation process you may be prompted with the following dialog:
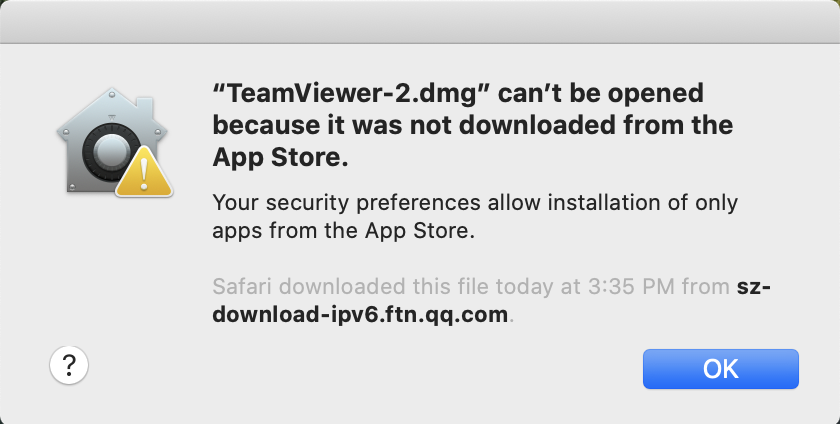
To get rid of this, you can:
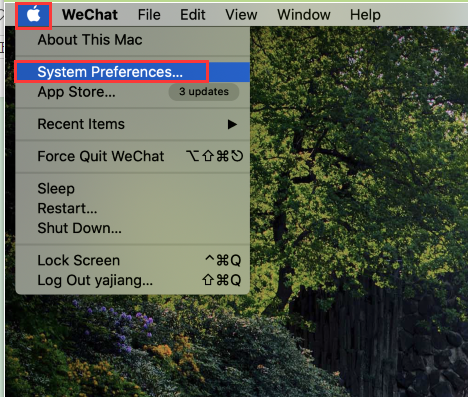
1. Click the Apple symbol in your OS X menu bar and open System Preferences.
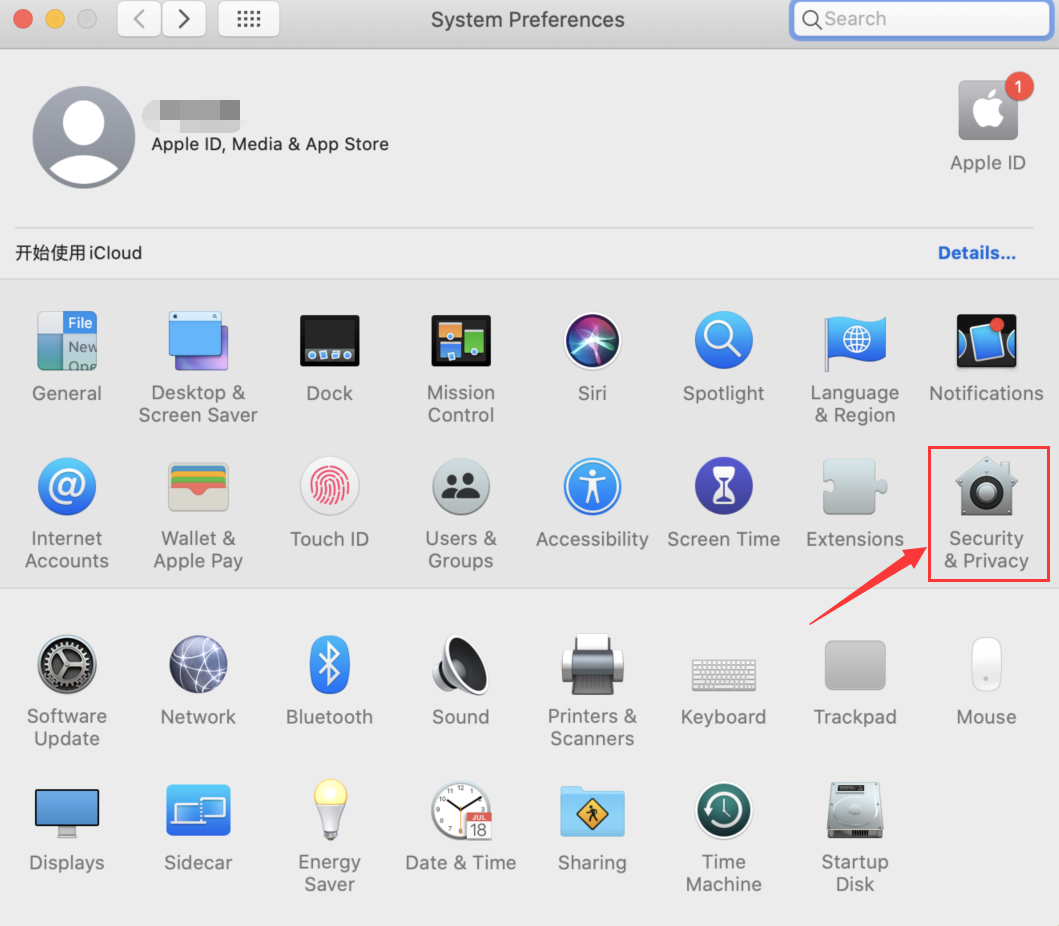
2. Choose Security & Privacy.
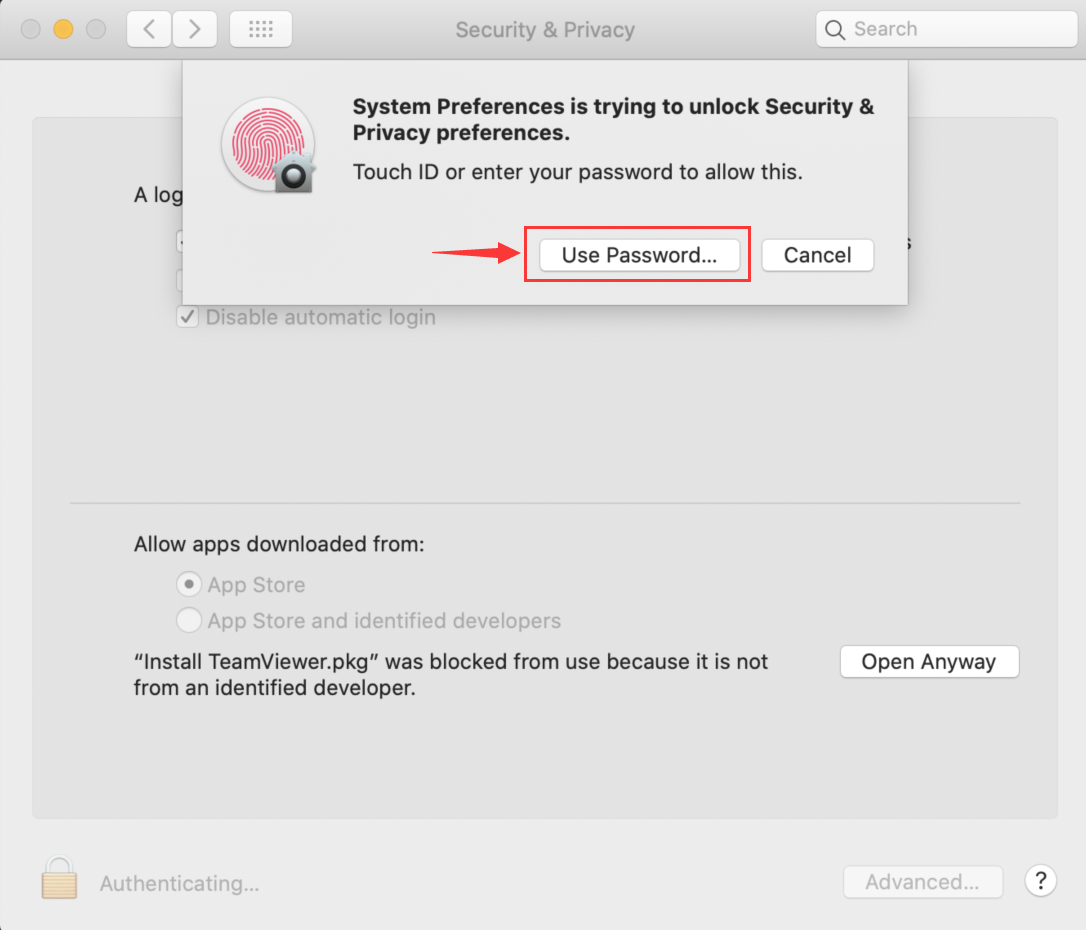
3. From the Security & Privacy panel open the General tab and select Accessibility, next click the Lock icon to input the system password:
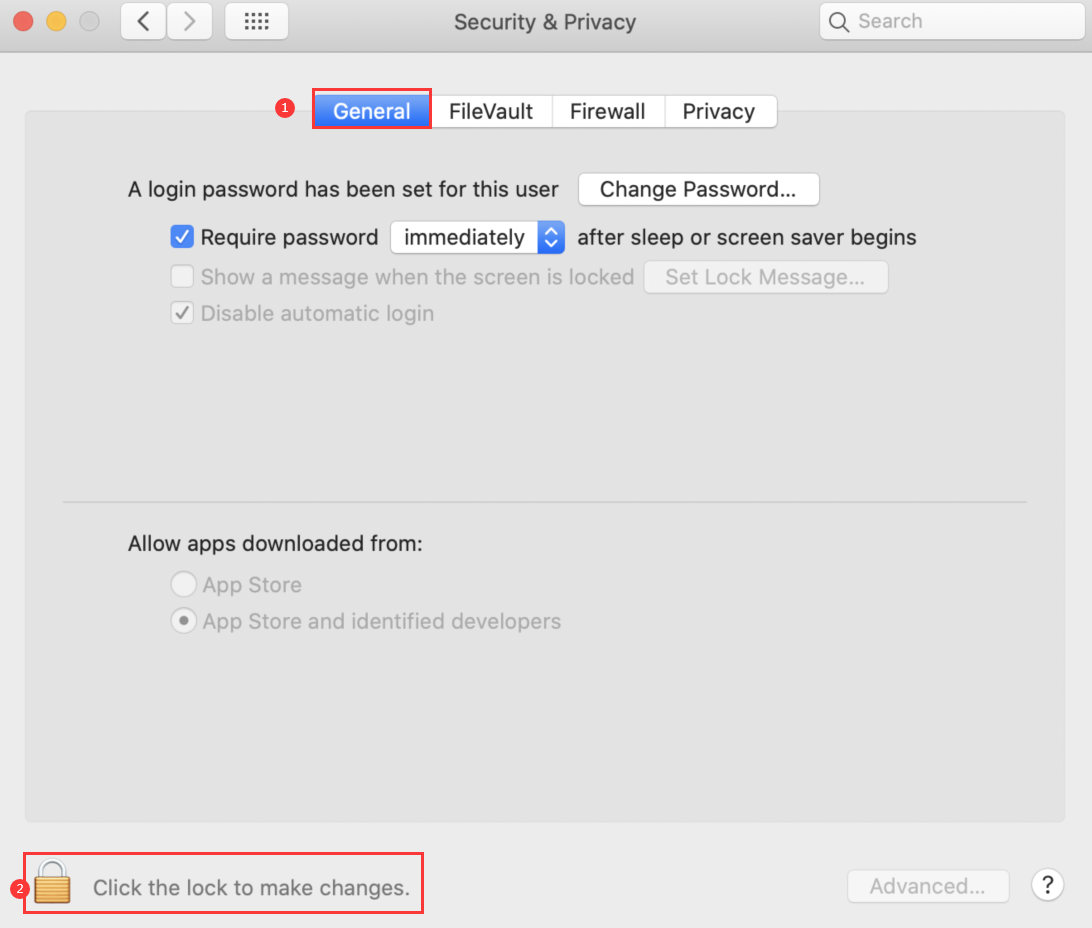
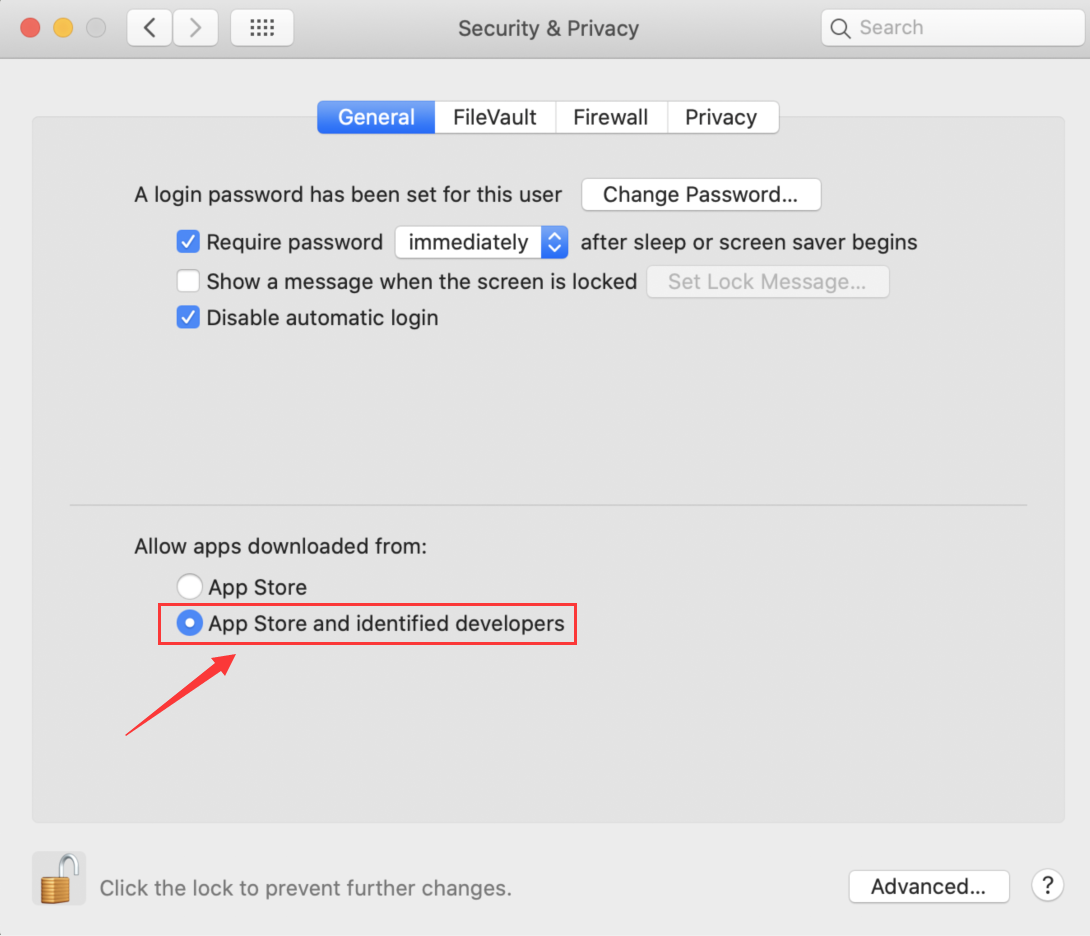
4. Choose to allow apps downloaded from App Store and identified developers.
5. Restart the installation for TeamViewer.
How to Grant Access Permission
When launching TeamViewer for the first time on the Mac running MacOS 10.14 (Mojave) or higher version, you might be prompted with a Review System Access page.
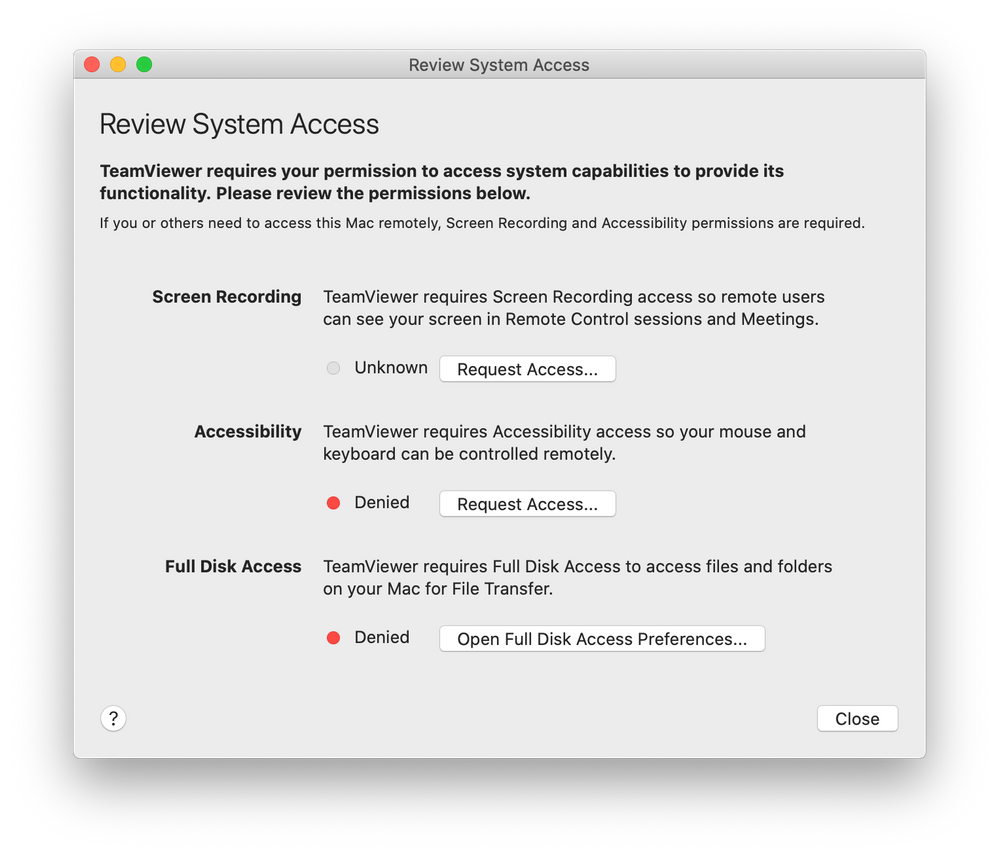
You can also re-open this page by clicking Help =>Check System Access after loading TeamViewer.

By default, all permissions are set to Denied. To ensure a proper remote session, Screen Recording and Accessibility permission are required at minimum. You can follow the steps below to get the permission:
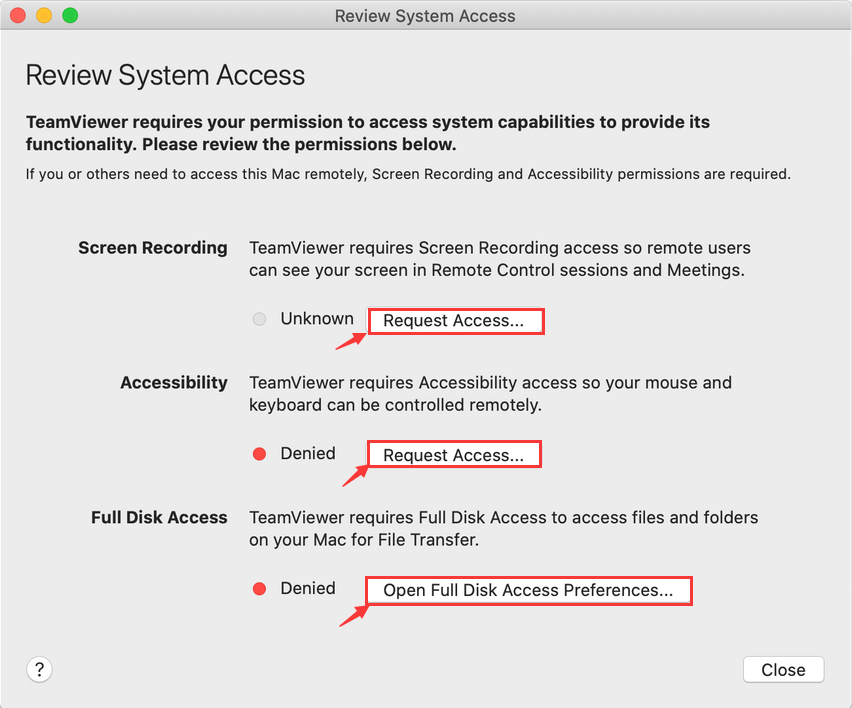
1. Click Request Access for Screen Recording and Accessibility.
2. You will be prompted the system Privacy page. Click the small + button as showing in the screen shot below. Next select TeamViewer, and click Open to add it to the list.
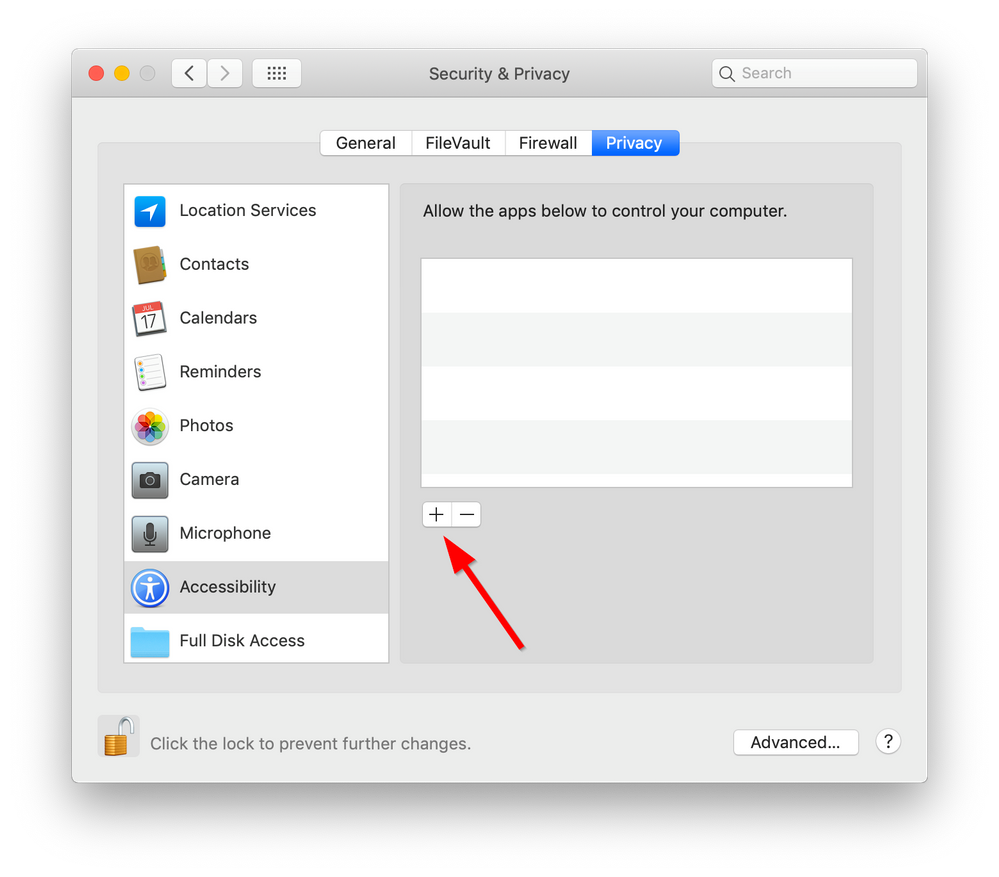
3. Check if TeamViewer is in the panel, if yes, put a check next to it to enable it.
Note: If the system does not allow you to do that, please click the Lock icon to make the changes available.
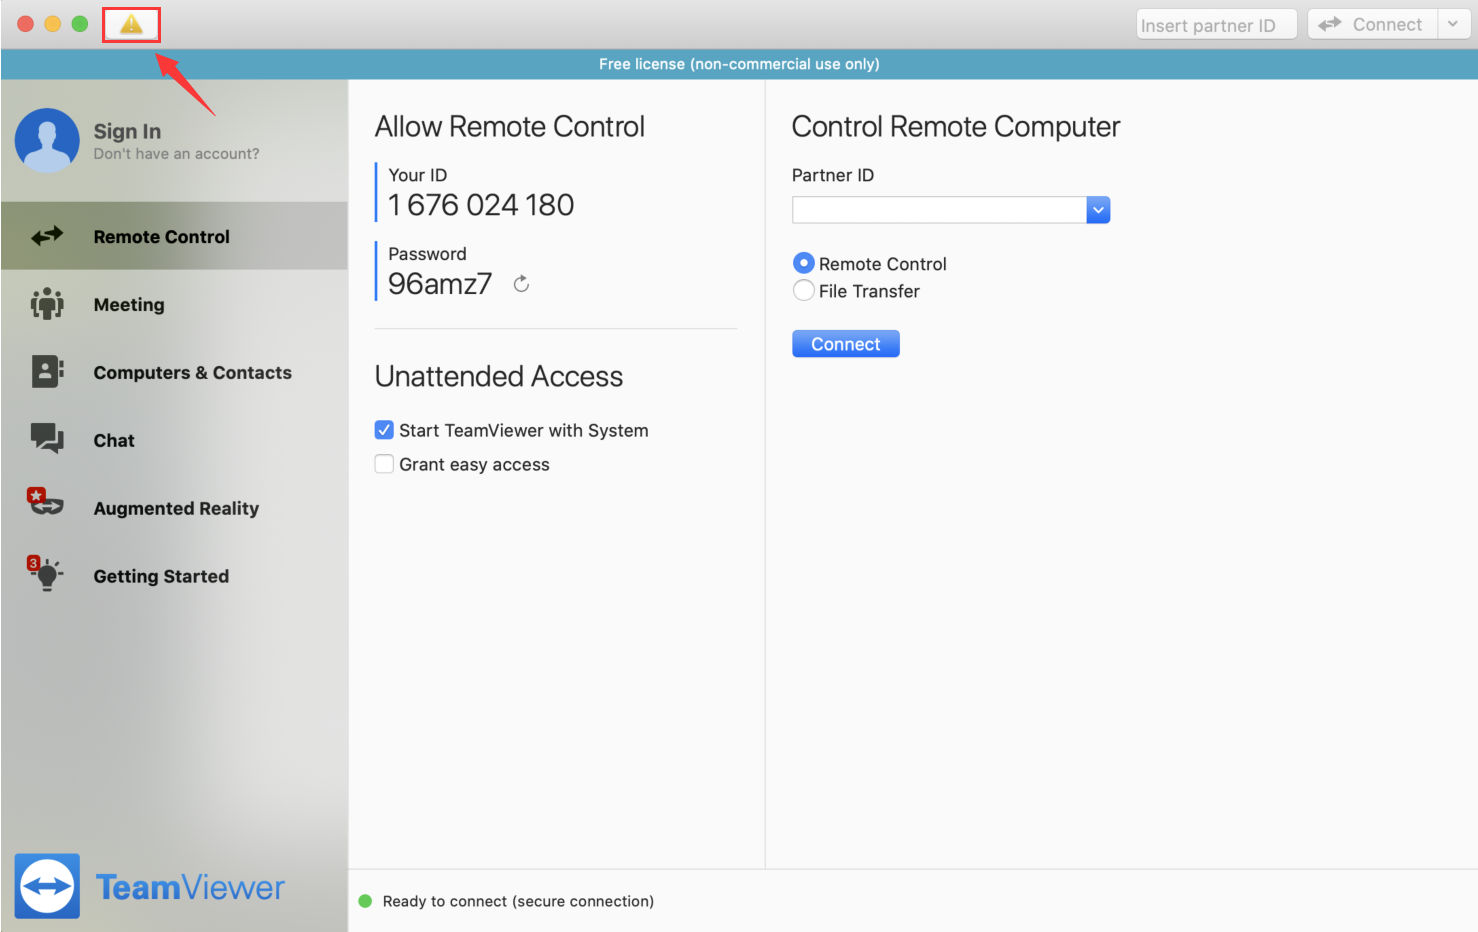
The yellow triangle icon in the upper-left area of the TeamViewer window is shown until you have allowed the system access for TeamViewer:
How to Do if You Cannot Get the Review System Access Page?
If you are using an older version of TeamViewer, or you previously clicked the Deny button on that page, you might not be able to get the Review System Access page when you launch TeamViewer. When this happens, you can grant the access from the steps below:
1. Go to System Preferences => Security & Privacy => Privacy
2. You will get the same page as explained above to add TeamViewer for Screen Recording and Accessibility permission. Please Navigate to Screen Recording and Accessibility and follow the steps above to add TeamViewer into the Allow list for each of them.
After all are properly done, you can restart the TeamViewer, and give our tech support your TeamViewer ID and password to start the remote assistance.
If you still have any questions after reviewing this page, please feel free to contact us at support@easeus.com.
Apple has introduced a security mechanism since macOS 10.14 (Mojave), which requires special access to be granted to remote control applications like TeamViewer. If you use macOS 10.14 or higher version, it is neccessary to enable the accessibility permissions for TeamViewer, otherwise the TeamViewer will not be installed, or any TeamViewer users connecting to macOS 10.14 or higher version will not get the ability to see or control anything on this mac.
This article guides on how to enable the access permissions for TeamViewer on macOS 10.14 (Mojave) or higher versions. In case you have not yet installed TeamViewer on your Mac, please click HERE.
Install TeamViewer
During the installation process you may be prompted with the following dialog:
To get rid of this, you can:
1. Click the Apple symbol in your OS X menu bar and open System Preferences.
2. Choose Security & Privacy.
3. From the Security & Privacy panel open the General tab and select Accessibility, next click the Lock icon to input the system password:
4. Choose to allow apps downloaded from App Store and identified developers.
5. Restart the installation for TeamViewer.
How to Grant Access Permission
When launching TeamViewer for the first time on the Mac running MacOS 10.14 (Mojave) or higher version, you might be prompted with a Review System Access page.
You can also re-open this page by clicking Help =>Check System Access after loading TeamViewer.
By default, all permissions are set to Denied. To ensure a proper remote session, Screen Recording and Accessibility permission are required at minimum. You can follow the steps below to get the permission:
1. Click Request Access for Screen Recording and Accessibility.
2. You will be prompted the system Privacy page. Click the small + button as showing in the screen shot below. Next select TeamViewer, and click Open to add it to the list.
3. Check if TeamViewer is in the panel, if yes, put a check next to it to enable it.
Note: If the system does not allow you to do that, please click the Lock icon to make the changes available.
The yellow triangle icon in the upper-left area of the TeamViewer window is shown until you have allowed the system access for TeamViewer:
How to Do if You Cannot Get the Review System Access Page?
If you are using an older version of TeamViewer, or you previously clicked the Deny button on that page, you might not be able to get the Review System Access page when you launch TeamViewer. When this happens, you can grant the access from the steps below:
1. Go to System Preferences => Security & Privacy => Privacy
2. You will get the same page as explained above to add TeamViewer for Screen Recording and Accessibility permission. Please Navigate to Screen Recording and Accessibility and follow the steps above to add TeamViewer into the Allow list for each of them.
After all are properly done, you can restart the TeamViewer, and give our tech support your TeamViewer ID and password to start the remote assistance.
If you still have any questions after reviewing this page, please feel free to contact us at support@easeus.com.