- EaseUS Freeware
- Free Data Recovery Software
- Free Backup Software
- Free Partition Manager
Updated on 2023-01-03
Applies to:
EaseUS NTFS for Mac
If you are using EaseUS NTFS for Mac to read and write external NTFS drive on a Mac with M series chips, you will receive a prompted message like below:
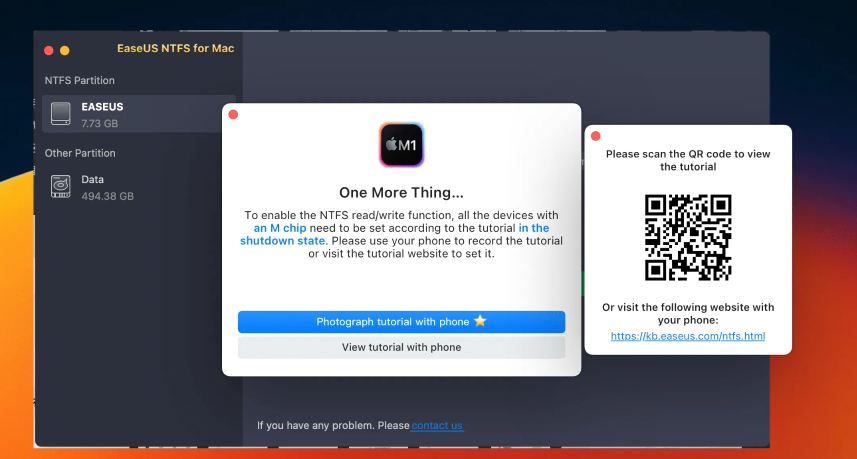
In order to obtain the authorization to read and write the external NTFS drive, EaseUS NTFS for Mac requires the system extension to be enabled on your Mac. On all the Macs with M series chips, you will need to go to the Recovery environment to enable system extensions.
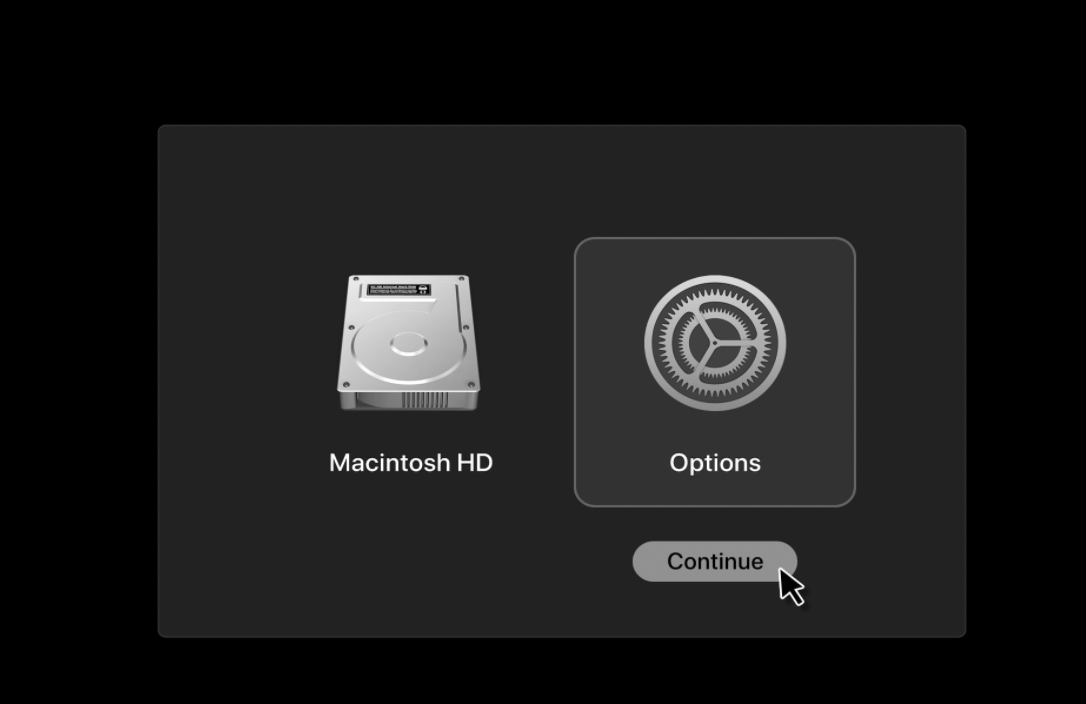
To do so, save all the works on your Mac and shut down the system. Then press and hold the Touch ID or Power button until you see the Option icon appears on the screen.
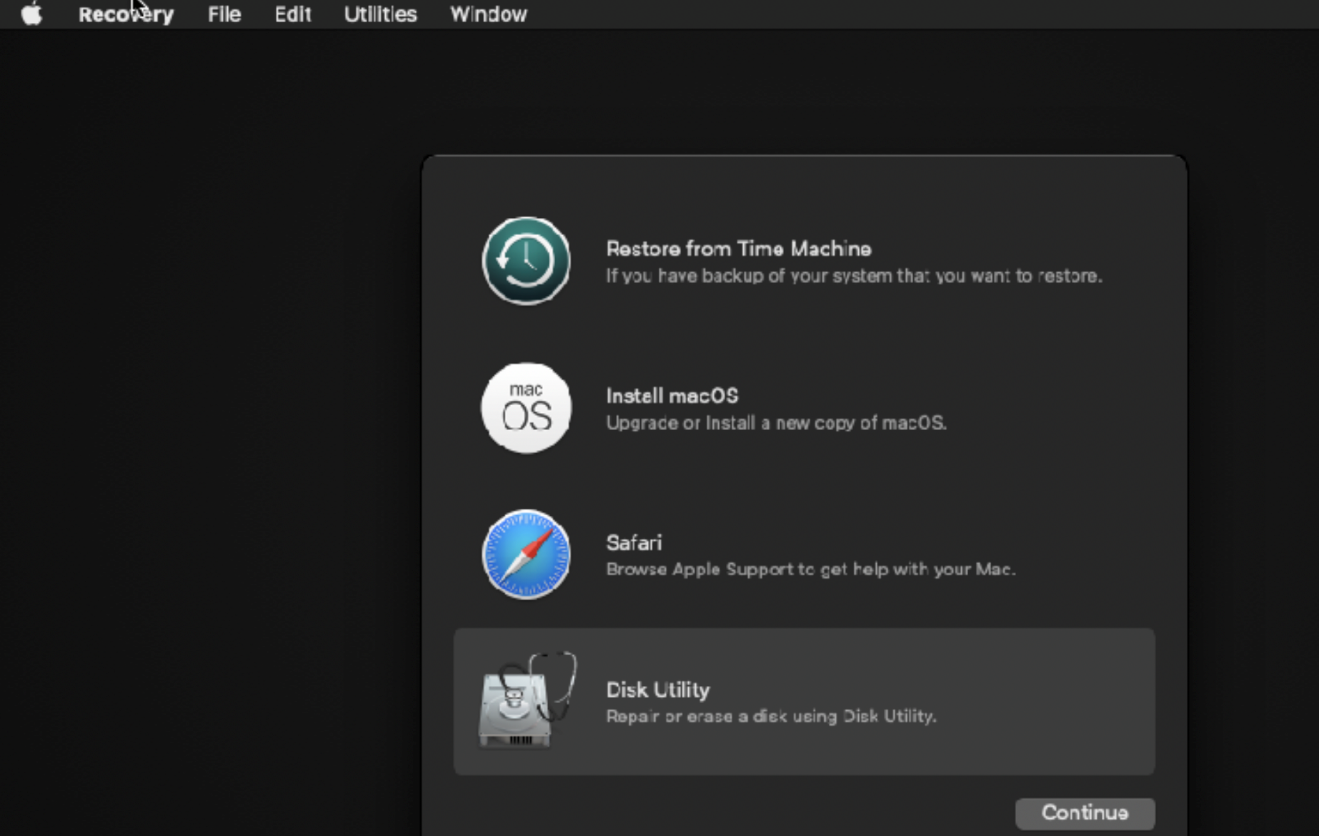
After this, you might need to select your Apple account and fill in the password to boot in Recovery mode. You will then get the following menu.
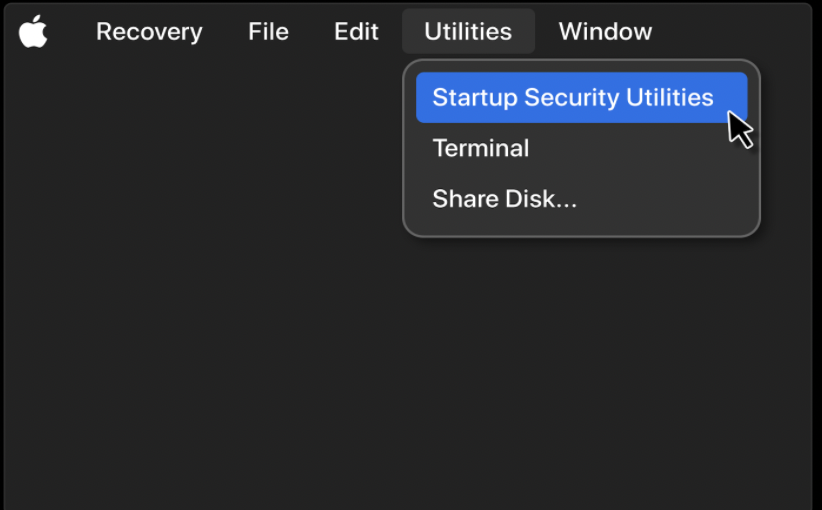
Click on Utilities from the menu bar. Next select Startup Security Utilities.
Select the drive where EaseUS NTFS for Mac is supposed to be installed, generally it should be the Macintosh HD. Click the Security Policy button.

In the prompted window, the Reduced Security setting needs to be selected. Then check the allow user management of kernel extensions from identified developers. Click Ok to save your new startup settings. Then restart your machine.
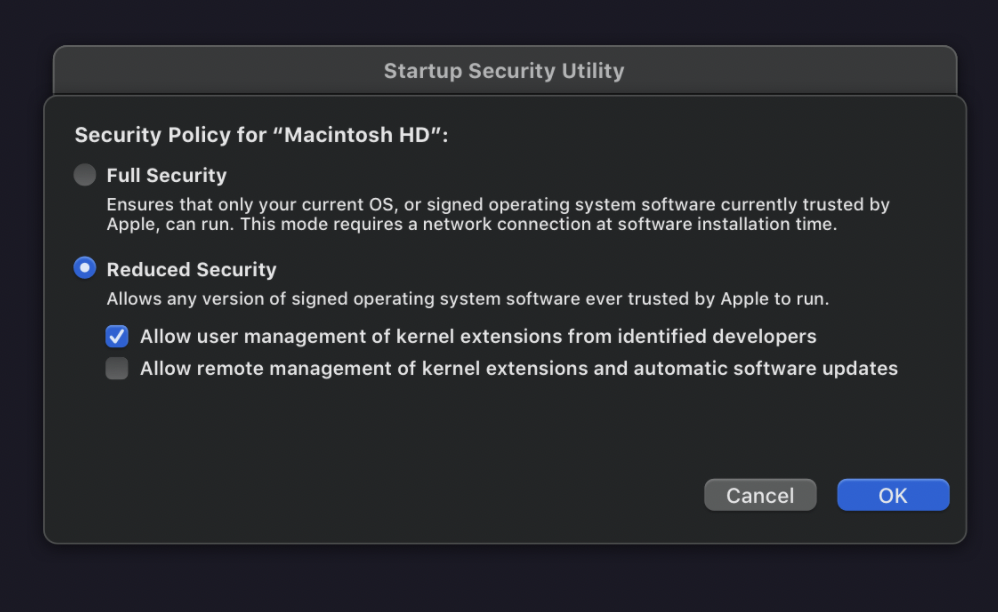
Click Ok to save your new startup settings. Then restart your machine.
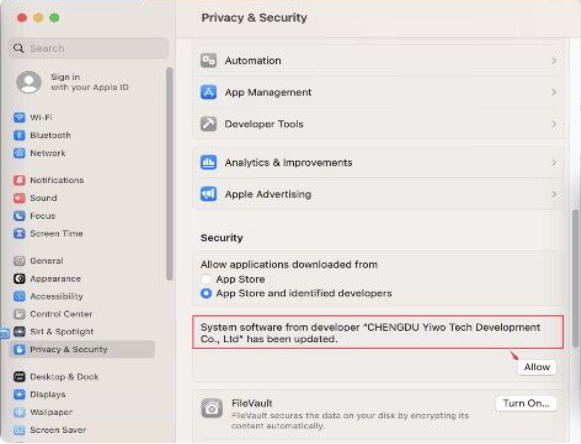
After your Mac restarts, run EaseUS NTFS for Mac again. The General Security & Privacy page will be prompted automatically. If not, manually navigate to this page in System Preference. Next click the Allow button to accept the kernel extensions of EaseUS NTFS for Mac.
EaseUS NTFS for Mac
If you are using EaseUS NTFS for Mac to read and write external NTFS drive on a Mac with M series chips, you will receive a prompted message like below:
In order to obtain the authorization to read and write the external NTFS drive, EaseUS NTFS for Mac requires the system extension to be enabled on your Mac. On all the Macs with M series chips, you will need to go to the Recovery environment to enable system extensions.
To do so, save all the works on your Mac and shut down the system. Then press and hold the Touch ID or Power button until you see the Option icon appears on the screen.
After this, you might need to select your Apple account and fill in the password to boot in Recovery mode. You will then get the following menu.
Click on Utilities from the menu bar. Next select Startup Security Utilities.
Select the drive where EaseUS NTFS for Mac is supposed to be installed, generally it should be the Macintosh HD. Click the Security Policy button.
In the prompted window, the Reduced Security setting needs to be selected. Then check the allow user management of kernel extensions from identified developers. Click Ok to save your new startup settings. Then restart your machine.
Click Ok to save your new startup settings. Then restart your machine.
After your Mac restarts, run EaseUS NTFS for Mac again. The General Security & Privacy page will be prompted automatically. If not, manually navigate to this page in System Preference. Next click the Allow button to accept the kernel extensions of EaseUS NTFS for Mac.