- EaseUS Freeware
- Free Data Recovery Software
- Free Backup Software
- Free Partition Manager
Updated on 2025-02-27
Applies to:
EaseUS MobiMover
If you're experiencing issues with EaseUS MobiMover, adding or replacing a patch in the installation directory may help resolve the problem. This guide will walk you through the steps to safely replace the patch file in EaseUS MobiMover.
Before proceeding, ensure you have the correct patch file provided by EaseUS support or the official website.
Step 1: Locate EaseUS MobiMover Installation Directory
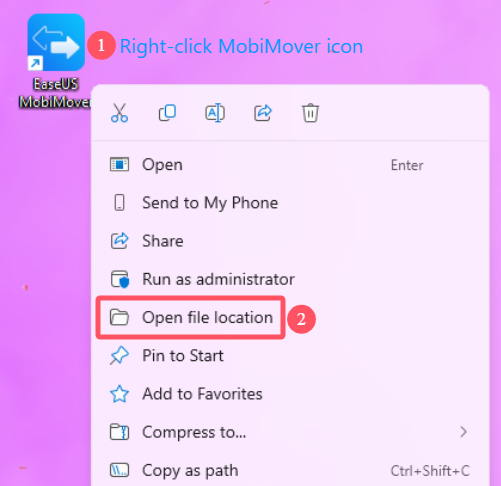
Right-click the shortcut icon of EaseUS MobiMover on the desktop of your computer, and select "Open file location".
Step 2: Backup the existing patch file
1. Locate the file you want to replace in the installation folder (normally in the bin folder).
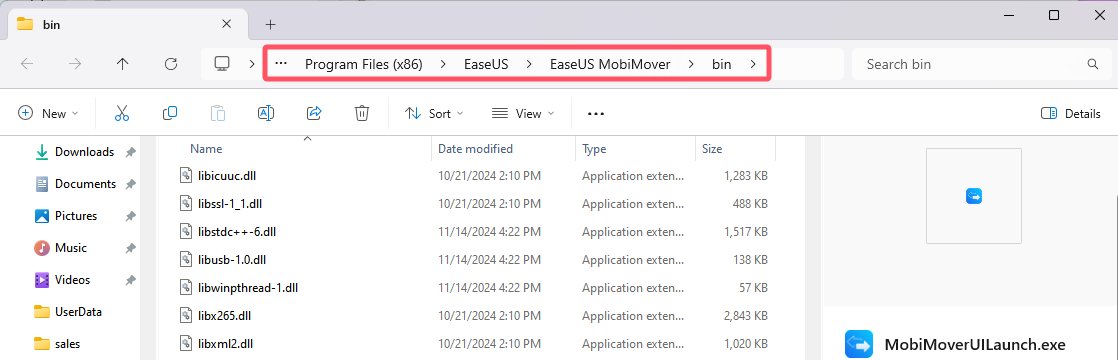
2. Copy the file and save it to a different location as a backup in case you need to revert the changes.
Step 3: Replace the patch file
1. Copy the new patch file you received or downloaded and paste it into the required installation directory of EaseUS MobiMover (normally into the bin folder).
2. If prompted, confirm to replace the existing file.
Step 4: Restart the software
Restart the software to ensure the new patch file is applied correctly. If the file you replace is the launcher of the software, ensure you send the new launcher to your desktop and start the software from the new launcher.
Troubleshooting
If you continue to experience issues after applying the patch, please reach out to our support team at helpdesk@easeus.com for further assistance.