- EaseUS Freeware
- Free Data Recovery Software
- Free Backup Software
- Free Partition Manager
Updated on 2022-08-05
This article applies to:
EaseUS MobiUnlock
Product Introduction:
WinRa1n is a free jailbreak program designed for Windows users. It enables individuals to jailbreak their iPhone and iPad devices running on iOS versions 12.0 to 16.7.4.
System Requirements:
Windows XP (32-bit), Win 7 and later versions (32-bit and 64-bit)
Supported Device:
The tool offers different methods tailored to specific devices. Please ensure you have identified your device classification and chosen the appropriate jailbreak method.
For iOS/iPadOS 12.0-14.8.1:
A7-iPhone 5S, iPad Air, iPad mini 2, iPad mini 3.
A8-iPhone 6, iPhone 6 Plus, iPad Mini 4.
A9-iPhone 6s, iPhone 6S Plus, iPhone SE, iPad 5th generation(2017).
A9X-iPad Pro 1stgeneration (12.9 inches) , iPad Pro (9.7 inches).
A10-iPhone 7 and iPhone 7 Plus, iPad 6th generation(2018), iPad 7th generation(2019) (iOS 14 not supported).
A10X-iPad Pro 10.5inch (2017), iPad Pro 12.9inch 2nd generation (2017).
A11-iPhone 8, iPhone 8 Plus and iPhone X.
For iOS/iPadOS 15.0- 15.7.6:
A9-iPhone 6s, iPhone 6S Plus, iPhone SE, iPad 5th generation(2017).
A9X-iPad Pro 1st generation(12.9 inches), iPad Pro(9.7 inches).
A10-iPhone 7 and iPhone 7 Plus, iPad 6th generation (2018), iPad 7th generation(2019) (does not support iOS 14).
A10X-iPad Pro 10.5 inch(2017), iPad Pro 12.9inch 2nd generation (2017).
A11-iPhone 8, iPhone 8 Plus and iPhone X.
For ios/iPadOS 16.0 - 16.7.4:
A11-iPhone 8, iPhone 8 Plus and iPhone X.
Click Here to Download WinRa1n
Preparations before jailbreak:
Please begin by installing the necessary driver to establish a functioning operating environment.
UsbDk_1.0.22_x64.msi
1. Run the software
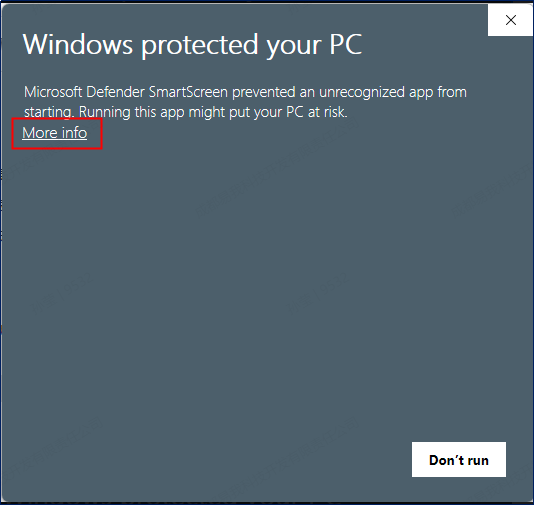
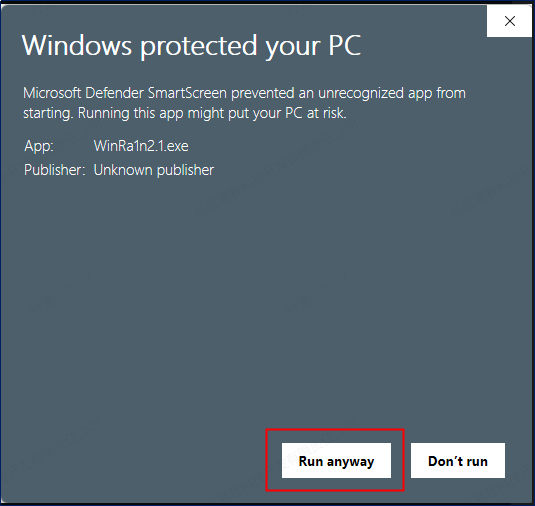
Run WinRa1n2.1.exe with administrator privileges. During execution, a Windows system prompt will appear. Click More info, and then click Run anyway.
2. Connect devices
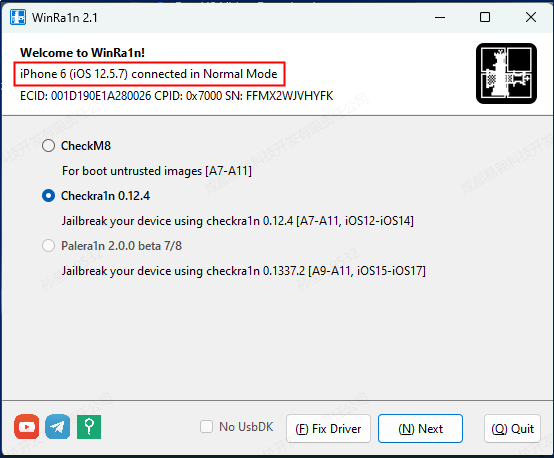
Connect your device to the computer using a USB cable. Once the connection is done, the software will display the device name, iOS version, and mode.
Operating Procedures:
Before initiating the jailbreak process, make sure to select the correct method based on your device's classification.
EaseUS MobiUnlock
Product Introduction:
WinRa1n is a free jailbreak program designed for Windows users. It enables individuals to jailbreak their iPhone and iPad devices running on iOS versions 12.0 to 16.7.4.
System Requirements:
Windows XP (32-bit), Win 7 and later versions (32-bit and 64-bit)
Supported Device:
The tool offers different methods tailored to specific devices. Please ensure you have identified your device classification and chosen the appropriate jailbreak method.
For iOS/iPadOS 12.0-14.8.1:
A7-iPhone 5S, iPad Air, iPad mini 2, iPad mini 3.
A8-iPhone 6, iPhone 6 Plus, iPad Mini 4.
A9-iPhone 6s, iPhone 6S Plus, iPhone SE, iPad 5th generation(2017).
A9X-iPad Pro 1stgeneration (12.9 inches) , iPad Pro (9.7 inches).
A10-iPhone 7 and iPhone 7 Plus, iPad 6th generation(2018), iPad 7th generation(2019) (iOS 14 not supported).
A10X-iPad Pro 10.5inch (2017), iPad Pro 12.9inch 2nd generation (2017).
A11-iPhone 8, iPhone 8 Plus and iPhone X.
For iOS/iPadOS 15.0- 15.7.6:
A9-iPhone 6s, iPhone 6S Plus, iPhone SE, iPad 5th generation(2017).
A9X-iPad Pro 1st generation(12.9 inches), iPad Pro(9.7 inches).
A10-iPhone 7 and iPhone 7 Plus, iPad 6th generation (2018), iPad 7th generation(2019) (does not support iOS 14).
A10X-iPad Pro 10.5 inch(2017), iPad Pro 12.9inch 2nd generation (2017).
A11-iPhone 8, iPhone 8 Plus and iPhone X.
For ios/iPadOS 16.0 - 16.7.4:
A11-iPhone 8, iPhone 8 Plus and iPhone X.
Click Here to Download WinRa1n
Preparations before jailbreak:
Please begin by installing the necessary driver to establish a functioning operating environment.
UsbDk_1.0.22_x64.msi
1. Run the software
Run WinRa1n2.1.exe with administrator privileges. During execution, a Windows system prompt will appear. Click More info, and then click Run anyway.
2. Connect devices
Connect your device to the computer using a USB cable. Once the connection is done, the software will display the device name, iOS version, and mode.
Operating Procedures:
Before initiating the jailbreak process, make sure to select the correct method based on your device's classification.
- Jailbreak for A7-A11, iOS/iPadOS 12-14
-
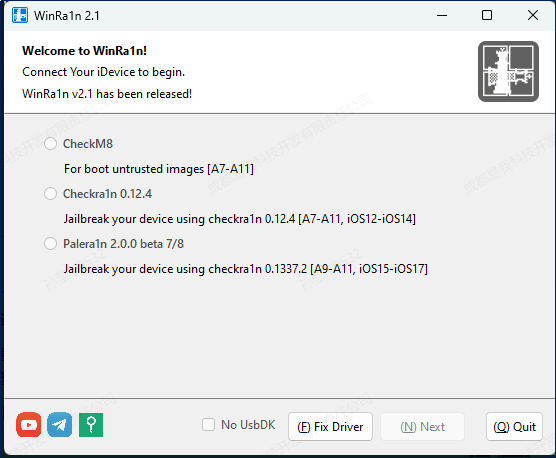
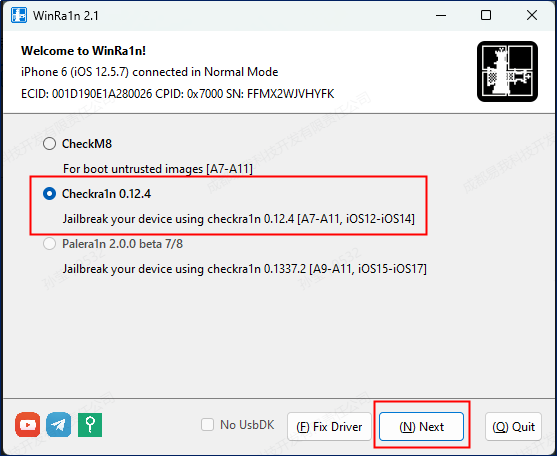
Step 1, Choose the jailbreak method as Checkra1n 0.12.4 and click on the Next button.
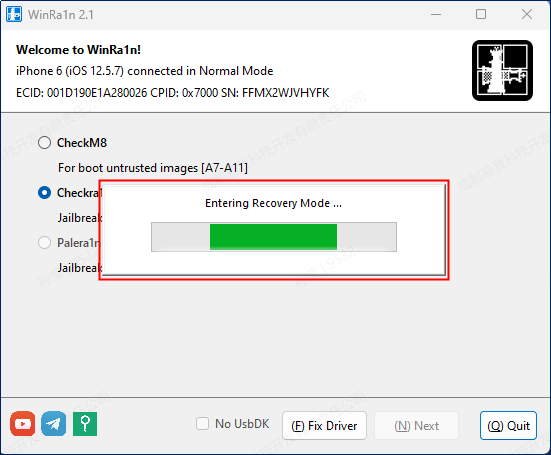
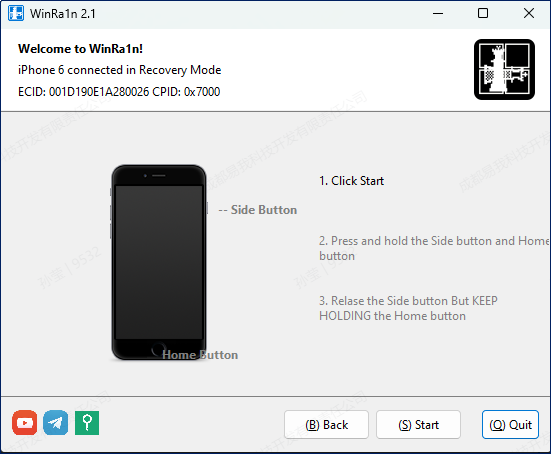
Step 2, The device will automatically enter into recovery mode. Follow the prompts on the tool to manually put your device into DFU Mode.
Note:
Please be sure to follow the steps displayed on the tool interface to set your device into the DFU Mode. After clicking the Start button on the tool, please immediately proceed to the second step prompted by the interface.
Step 3, After entering the DFU Mode, the tool will initiate the jailbreak process automatically.
Note:
While the jailbreak process is ongoing, refrain from interacting with your phone, unplugging the USB cable, or disconnecting the device from the PC.
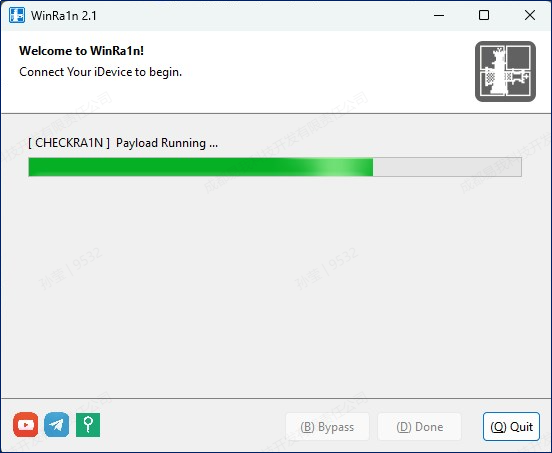
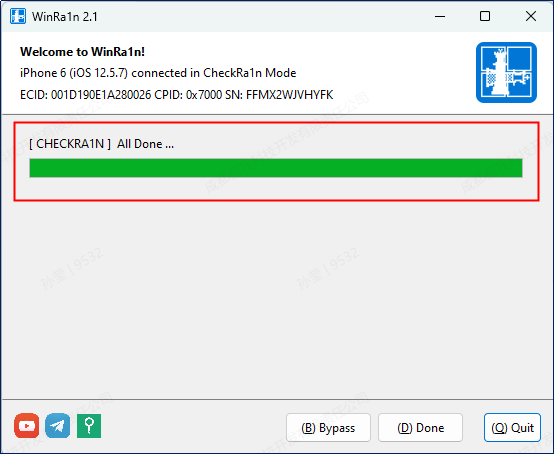
Once the process is completed, the tool will show as below.
Note:
If the jailbreak fails, please close the tool, restart the device and try again.
- Jailbreak for A9-A11, iOS/iPadOS 15-16
-
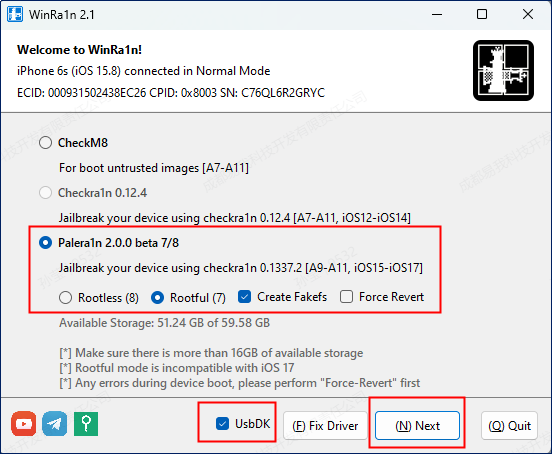
Step 1, Choose the jailbreak method as Palera1n 2.0.0 beta7/8. Select Rootful, Create Fakefs, and USbDK, then click the Next button.
Step 2, The device will automatically enter into recovery mode. Follow the prompts on the tool to manually put your device into DFU Mode.
Note:
Please be sure to follow the steps displayed on the tool interface to set your device into the DFU Mode. After clicking the Start button on the tool, please immediately proceed to the second step prompted by the interface.
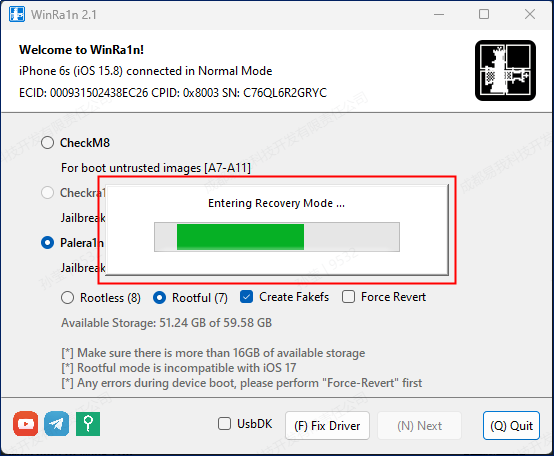
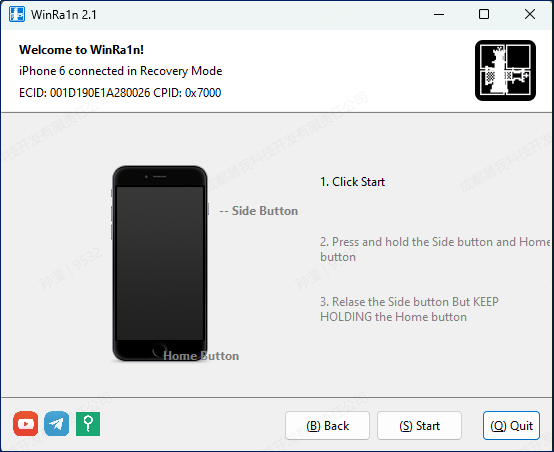
Step 3, After the device successfully enters DFU Mode, the tool will initiate the jailbreak process automatically.
Note:
While the jailbreak process is ongoing, refrain from interacting with your phone, unplugging the USB cable, or disconnecting the device from the PC.
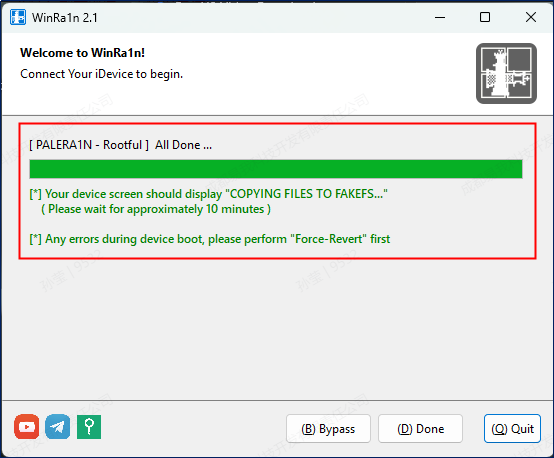
Step 4, The tool wil display the picture below, please wait for the phone to complete file copying.
Note:
While the jailbreak process is ongoing, refrain from interacting with your phone, unplugging the USB cable, or disconnecting the device from the PC. After the file copy is completed, the phone device will restart.
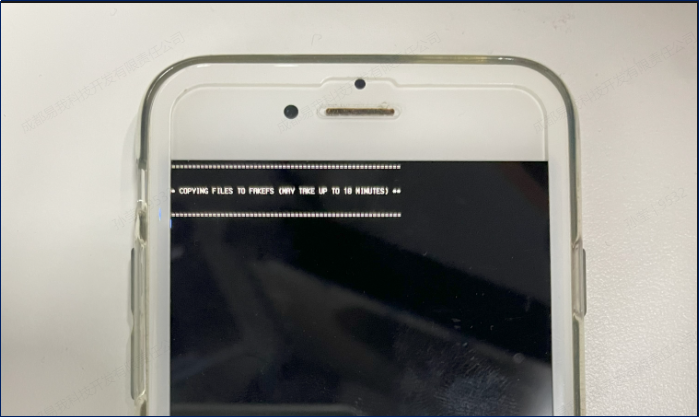
When the file copying is underway, the interface on your mobile phone will appear as shown below.
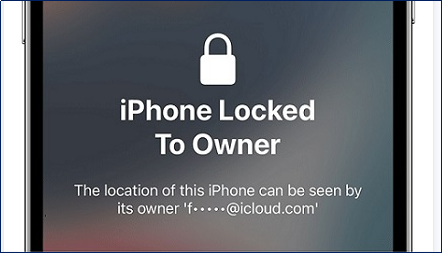
After the files are successfully copied, the phone device will restart to the iPhone Locked To Owner page.
Note:
If the device fails to start, please return to the WinRa1n tool homepage for a Force Revert.
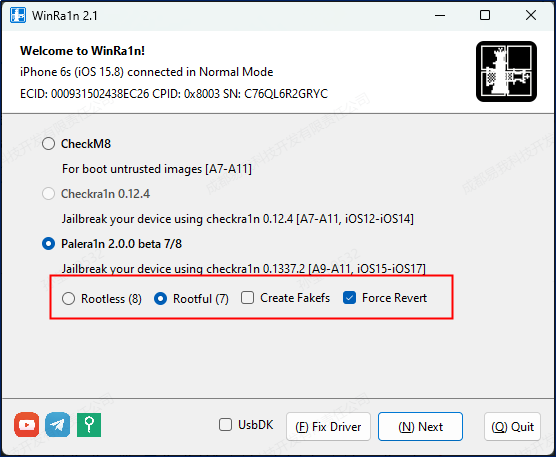
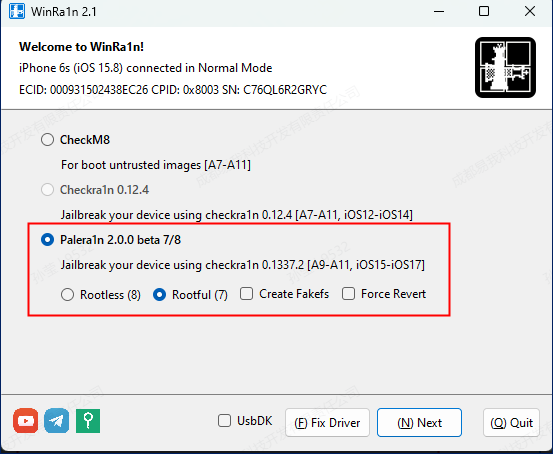
Step 5, After completing the above steps, click on the Done button to navigate back to the homepage of the tool, and re-select Rootful. On the second round, please deselect CreateFakefs and click the Next button to move on.
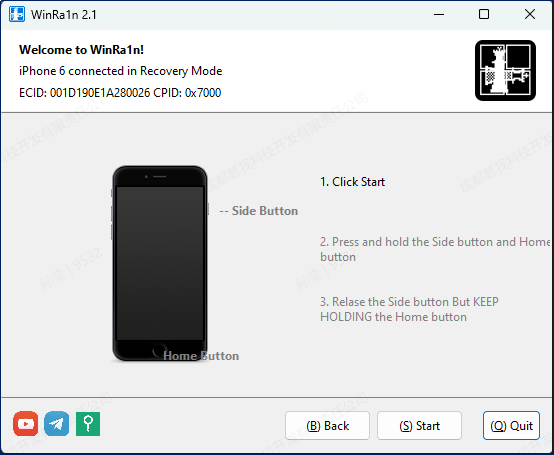
Step 6, The device will automatically re-enter the recovery mode. Please refer to the guide within the tool and manually set your device to DFU Mode.
Step 7, After the device successfully enters DFU Mode, the transition software will automatically perform the jailbreak.
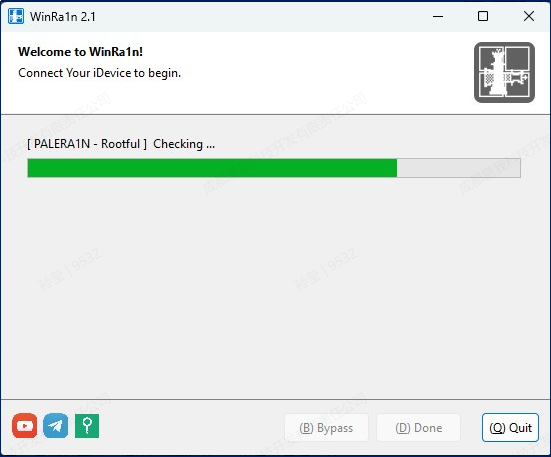
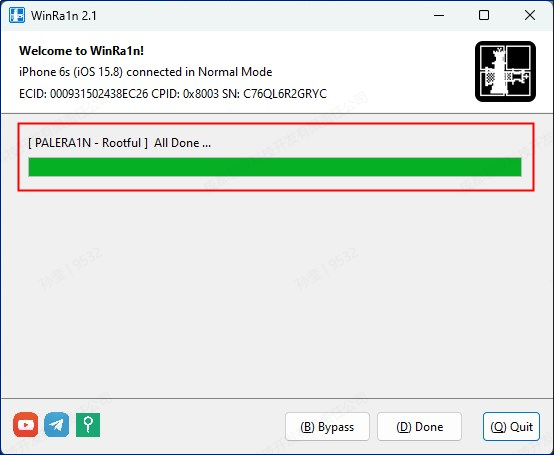
After the jailbreak is completed, the jailbreak software will appear as shown below.
Note:
If the jailbreak fails, please exit the jailbreak software, restart the device and try again.