- EaseUS Freeware
- Free Data Recovery Software
- Free Backup Software
- Free Partition Manager
Updated on 2025-03-31
This article applies to:
All editions of EaseUS Backup Center.
The solution to manage computers over the WAN in EaseUS Backup Center in different area
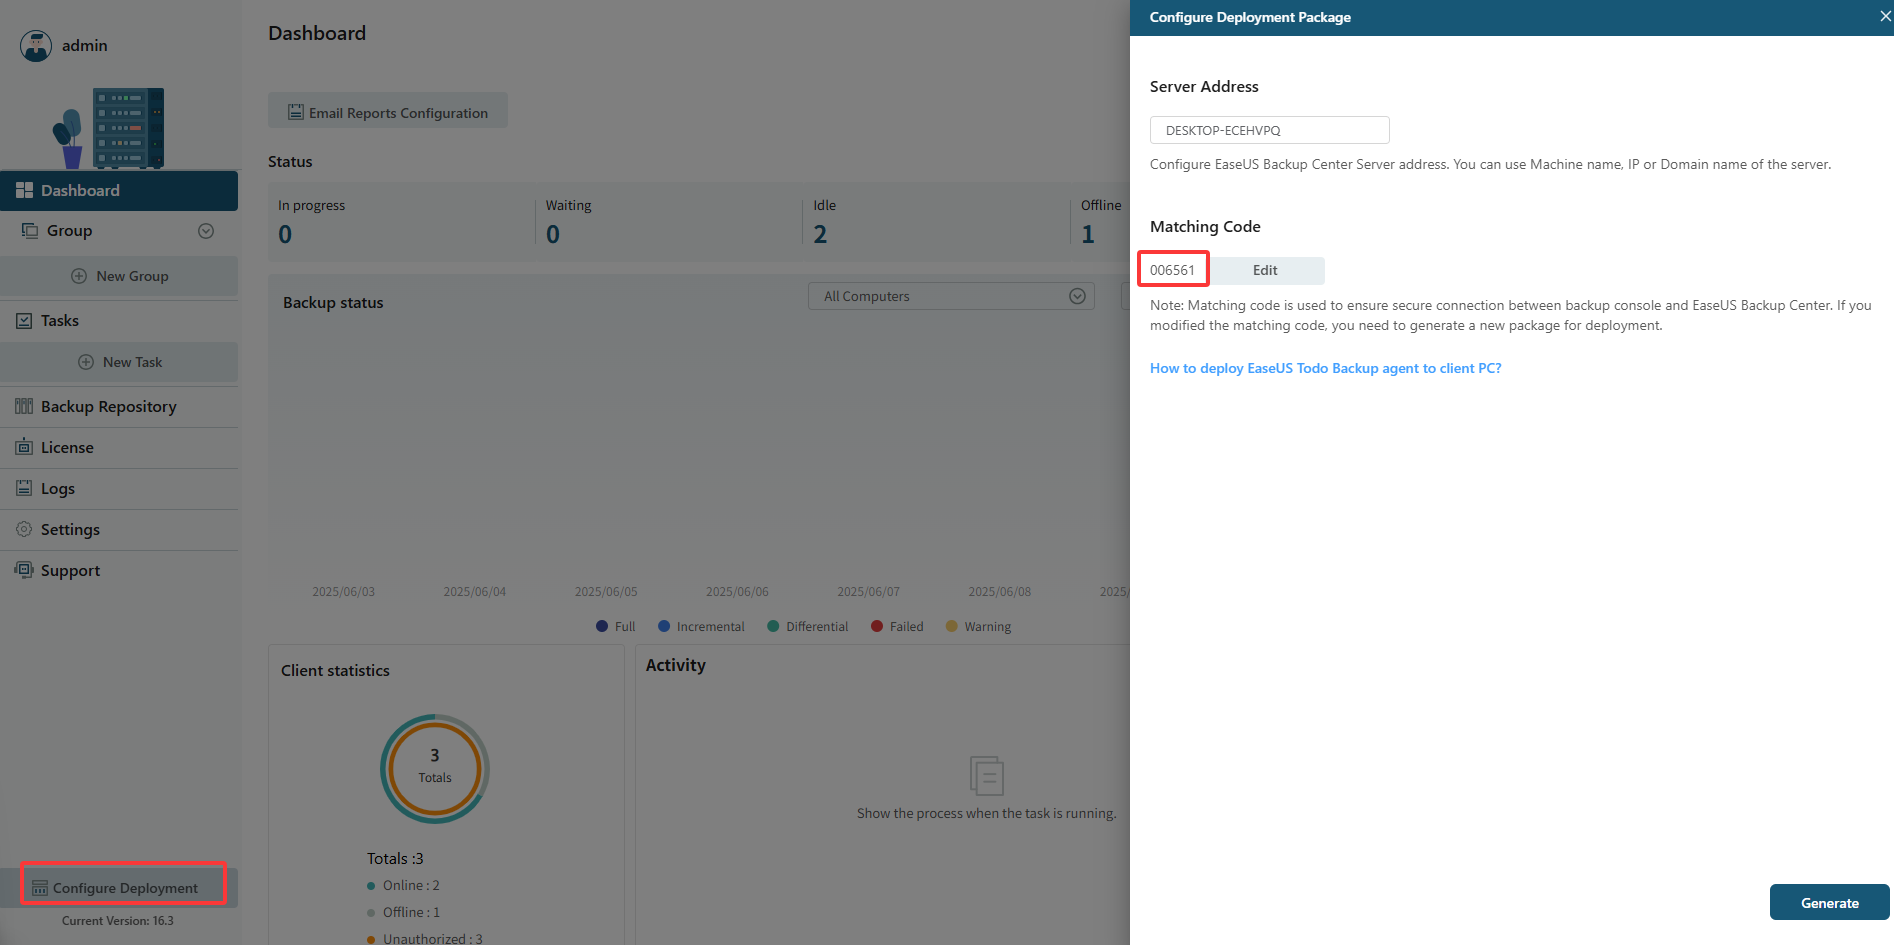
To add and fully manage computers over the WAN is supported in EaseUS Backup Center. To fulfill this goal, You need to get the public IP address, assign in your router a static port ID for the computer where the Backup Center software is installed, and find the Matching code(it is displayed when creating the MSI package on Backup Center software).
Let's use an example to explain how to manage this in a specific network environment.
This sample configuration is for the following environment:
Internet connection type: xDSL or cable internet
Type of IP address provided by Internet Service Provider (ISP): static*
IP address provided by ISP: 111.222.123.1 (sample only)
In general conditions the router provides you the feature to expose an internal computer to public and allows you to remotely manage the backup with Internet connection. This feature is also known as NAT (Network Address Translation). Normally, it can be found in Virtual Server setting after you login your router configuration page. Just like the picture below:

(Different router models might have different setting pages, the screen shot is just for your reference.)
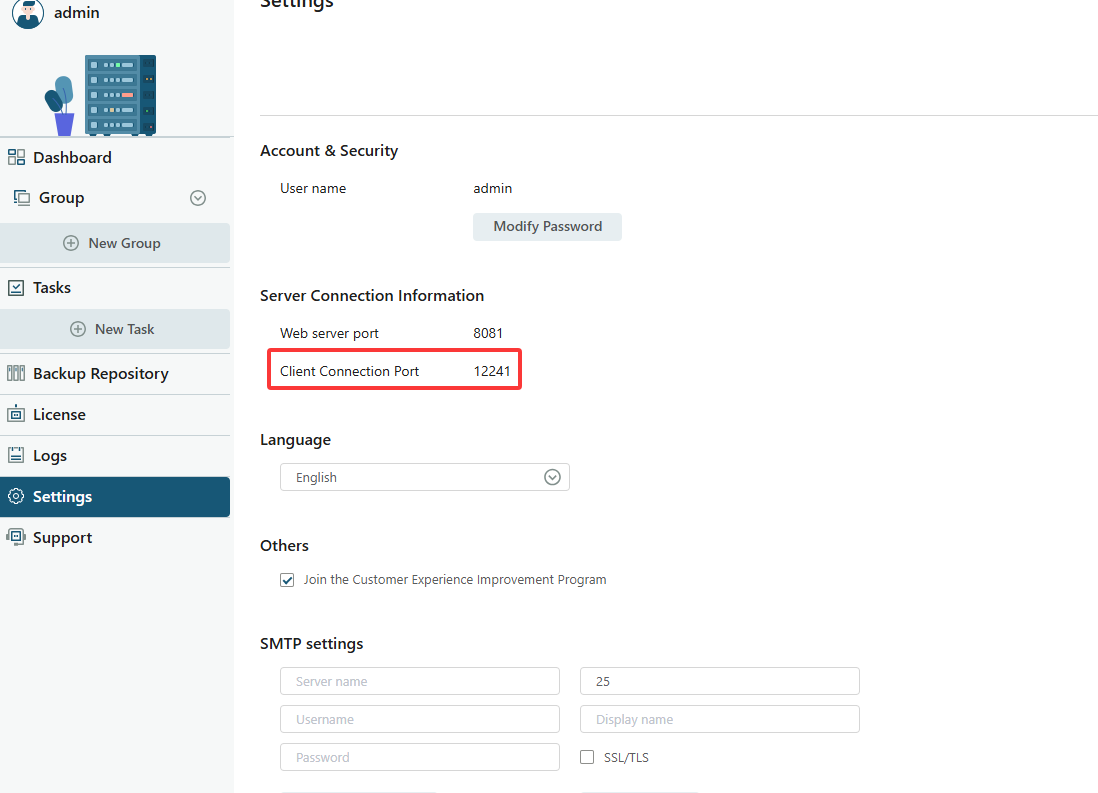
In the Virtual Server setting page, please create a new operation for the computer where the Backup Center software is installed, set the private port to XXXX(the client connection port, find it on the settings of Backup Center software), and assign a unique public port ID to the computer.
(The example in here shows in op. ID 5, 6001 was connected to Desktop 1).
For your reference: The client connection port ID required for private port is the communication port of EaseUS Backup Center. We use this ID to build connection by adding a new translation policy, so all access to a specific public port can be correctly transferred to the appointed internal computer.
After the setting in this example, the Desktop 1 can be recognized and accessed with the unique address 111.222.123.1:6001 in the network. The network environment after the configuration is as below:

After the configuration in your router setting, you can start connecting your computers in EaseUS Backup Center.
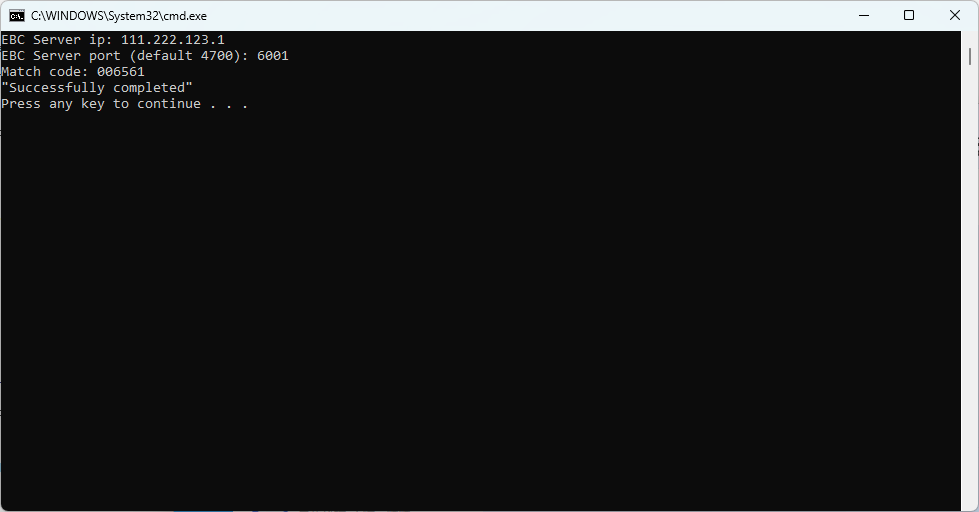
Below is a screen shot of how to add a client machine in the example when installing the Todo Backup software.
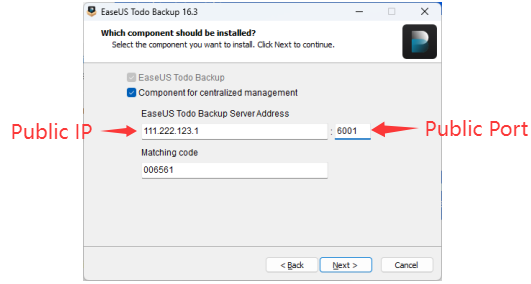
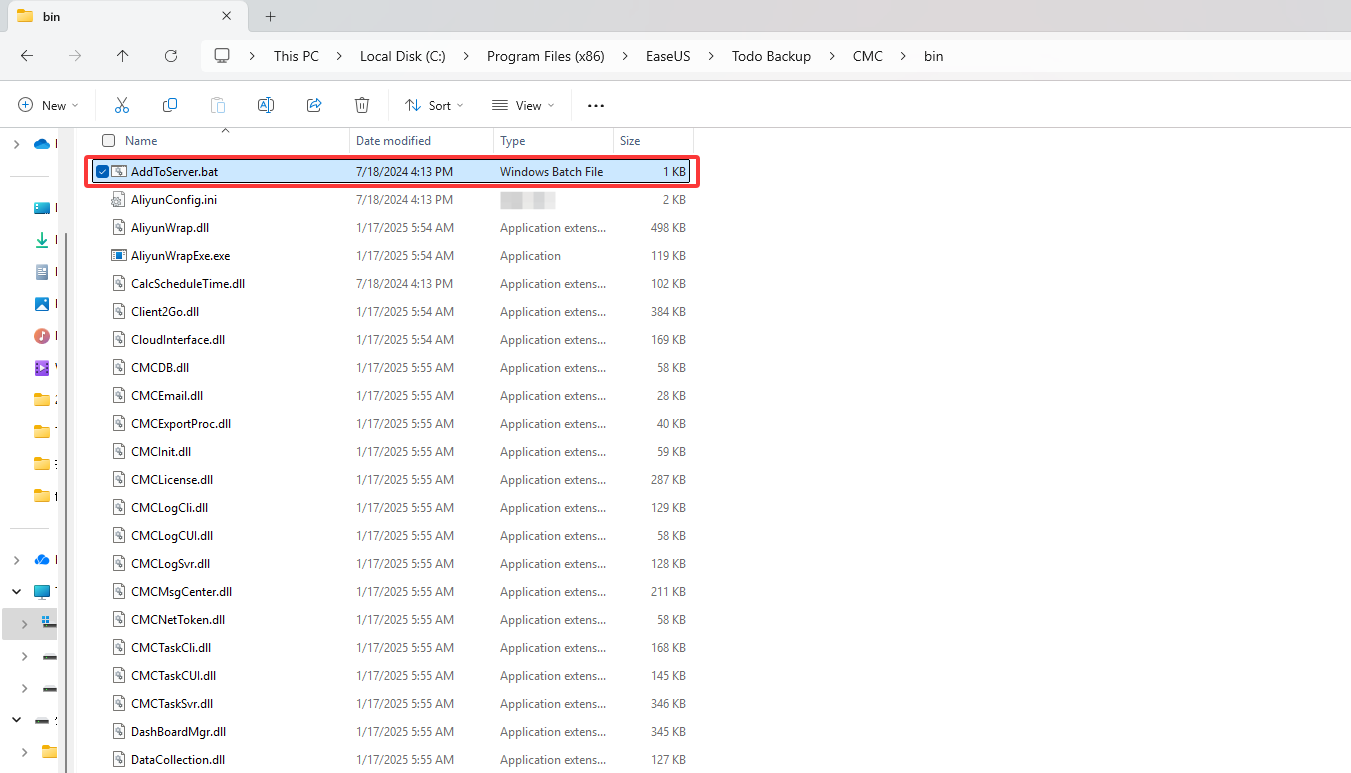
Alternatively, it is also allowed to enter these 3 key info after installing Todo Backup software, right-click AddToServer.bat file to run as Administrator at the path, C:\Program Files (x86)\EaseUS\Todo Backup\CMC\bin and enter the public IP, public port and matching code one by one.
You can follow the same steps to add and manage all the other computers.
Kindly reminder:
1. Your public ID has to be a static IP. A dynamic IP address will cause the computer added fails to be recognized and accessed by EaseUS Backup Center.